Launching a PHP Web Application AWS Elastic Beanstalk
Building a web application can often require a tremendous amount of knowledge in a wide variety of technologies. More than just knowing how to code in your preferred language, you also need to have a good grasp of the supporting technologies needed to launch your application. This can include knowledge of operating systems, web server applications, and hardware specifications. As your web application grows, you will be needing to consider how to scale your application, and for this, you will need knowledge of things like load balancing, distributed storage, application security, and more.
Amazon Web Services (AWS) provides all the technologies you need for getting your web applications up and running. It takes care of most of the heavy lifting for provisioning resources as needed. However, even if you don’t have to handle a physical server or install your own software, AWS can still be overwhelming. AWS provides more than a hundred services and going through each of these services to pick what you need would take a significant amount of time.
As someone new to AWS, I find that AWS can be a bit intimidating to learn since there are so many tools and services available. Knowing where to start is a challenge in itself. Thankfully, AWS has provided a service called Elastic Beanstalk that can help to quickly deploy and manage applications without having to learn about the underlying AWS infrastructure.
AWS Elastic Beanstalk makes it simple to deploy applications to the AWS Cloud without limiting your control or the choice of services you can use. You simply upload your code and make a few simple configuration changes and you’re good to go.
In the following section, we will go through some simple steps to upload and deploy a PHP application with Elastic Beanstalk.
Deploying a PHP Application with AWS Elastic Beanstalk
1. Have a working local PHP project.
For this walkthrough, I’ll assume you already have a working PHP project on your local setup. For this sample deployment, I will use a Laravel project for deployment.
2. Create a zip file of your project’s code.
You may use any tool you prefer to create a zip file of all the needed files in your project.
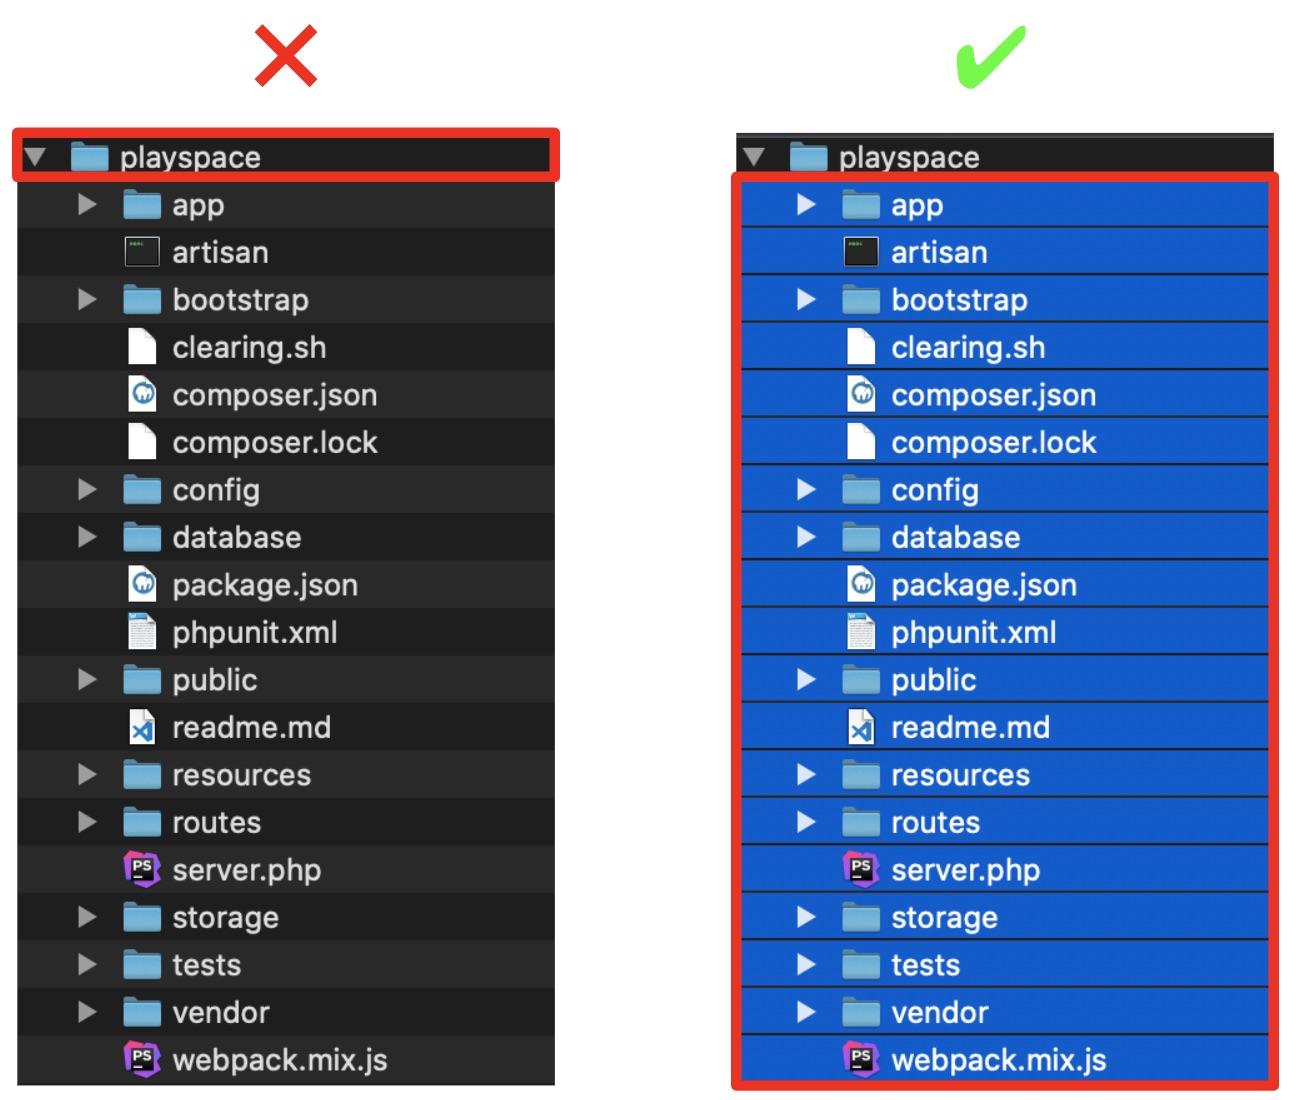
Note: When zipping your project’s files do not zip the root folder of your project, instead, zip the contents of your project directly.
 Optionally, if you are using composer to manage your PHP dependencies you may exclude the vendor folder to reduce the size of your zip file. Elastic Beanstalk will automatically install your dependencies as long as you include your composer.json in the zip file.
3. Create an Application in AWS Elastic Beanstalk.
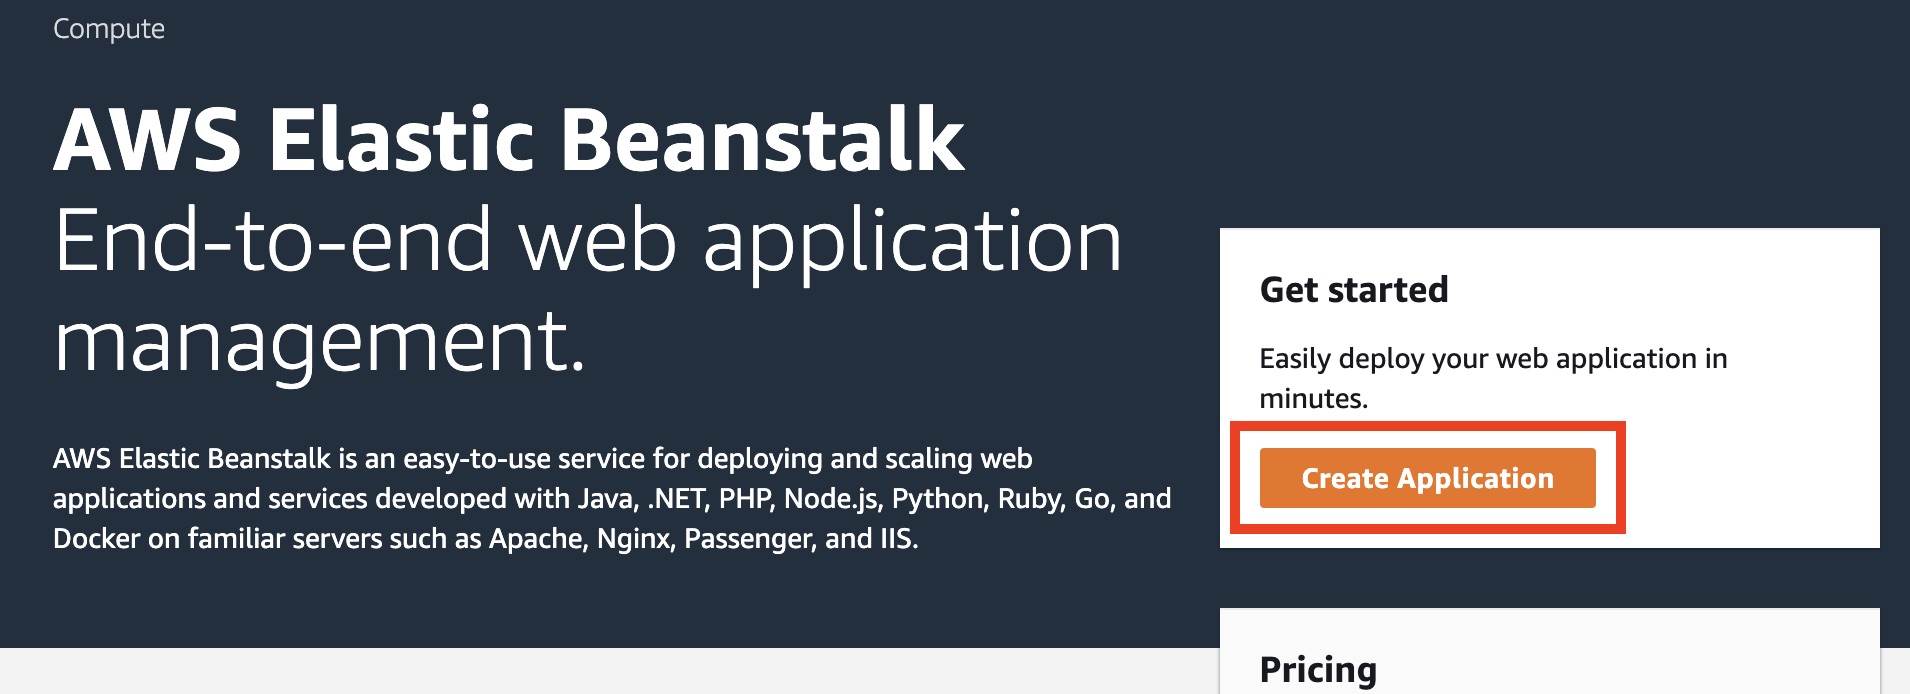
- Login to your AWS account and navigate to Elastic Beanstalk
- On the Elastic Beanstalk page click on “Create Application”, this will bring you to the Create a Web App page.
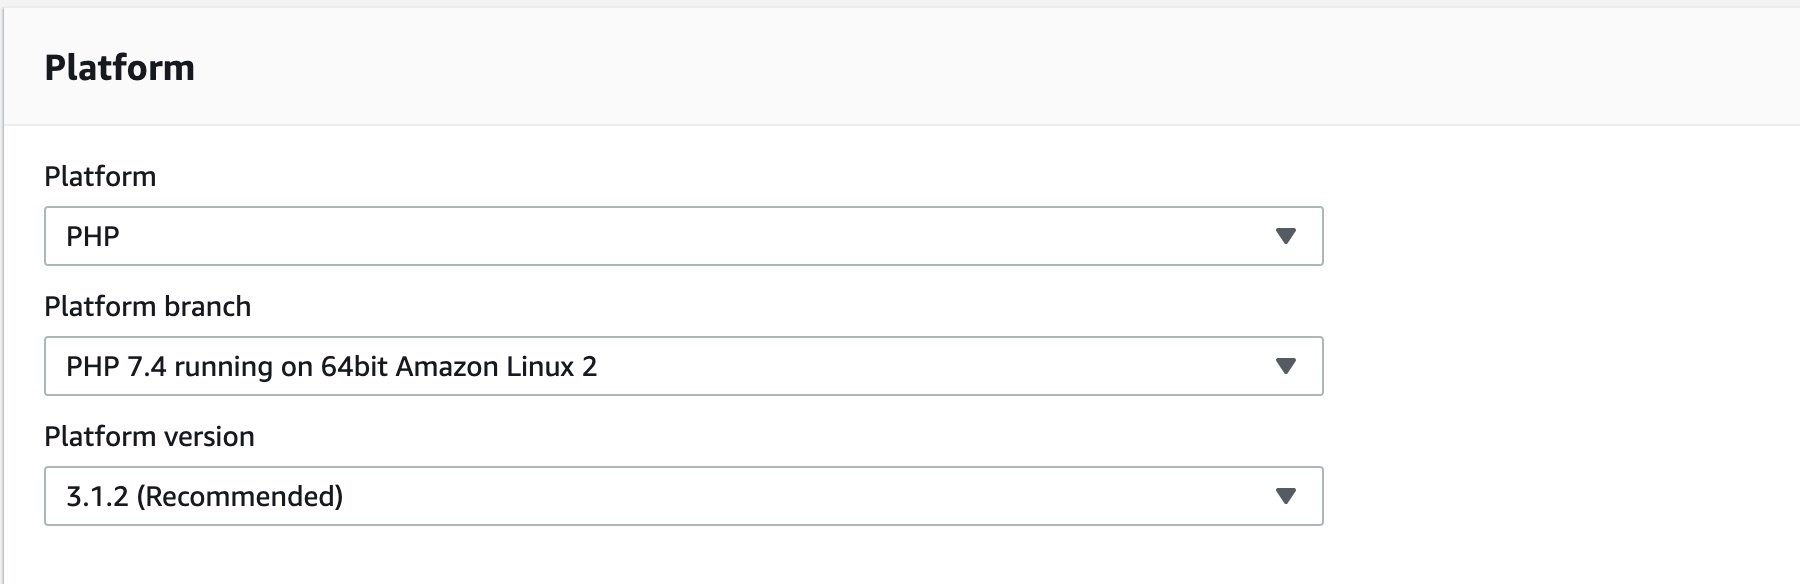
4. Select the configuration values that closely match your local setup.
- On the Create a Web App page the following fields are required:
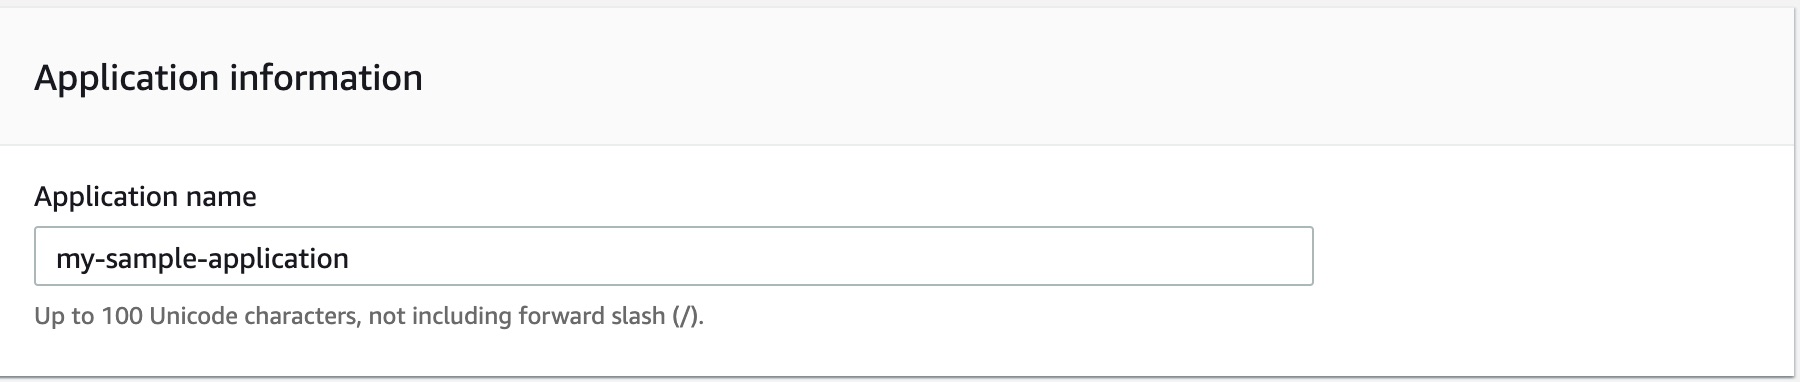
- Application Name: This could be any string, it will be used as an identifier for your application.
- Platform: Choose a platform that matches your local setup or app requirements.
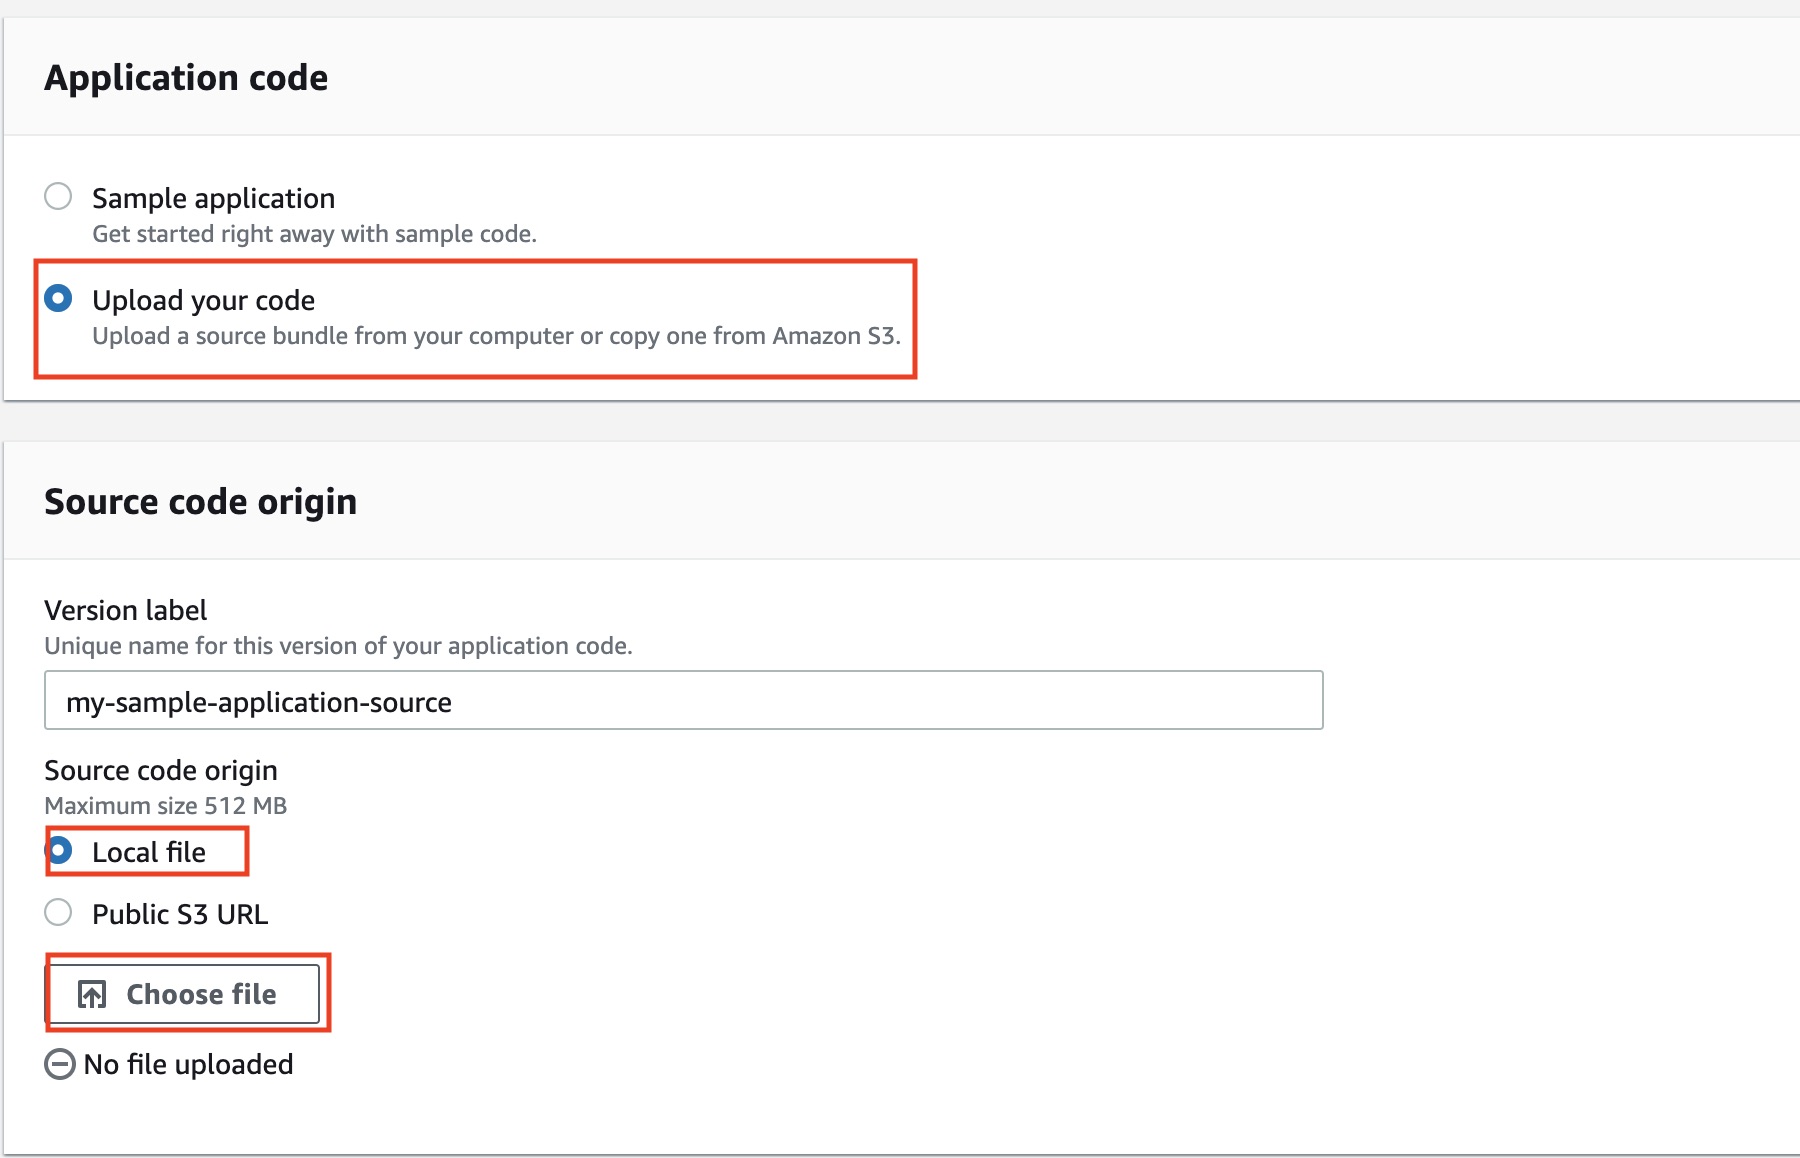
- Application Code: for this setting, you may select “Sample Application” to see a working sample app on your Elastic Beanstalk deployment. Otherwise, you may upload your zip file here.
- [Optional] If you are already familiar with more AWS services you may click on “Configure More Options” to add or tweak more services.
- Click on “Create Application” at the bottom of the page and wait for the configuration setup to complete.
- Application Name: This could be any string, it will be used as an identifier for your application.
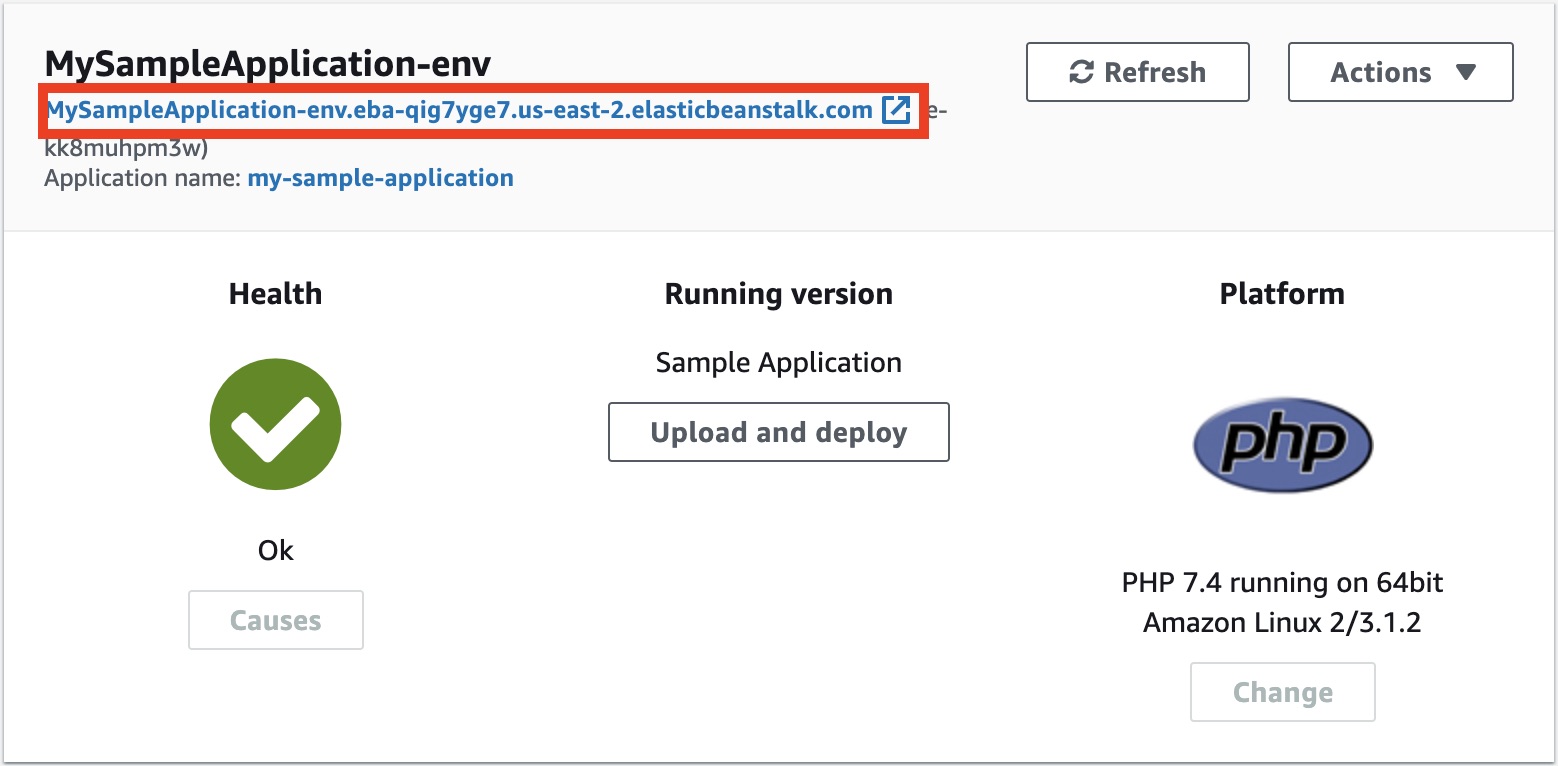
5. View your site.
After the setup completes, you may view your application using the URL that has been automatically generated by AWS.
6. Set your document root.
If your PHP application’s root document is in a different directory as with some PHP frameworks, you may update your configuration to point to your specific directory.
- Click the “Configuration” link on the left menu bar.

- On the Configuration page, click the “Edit” button Software.
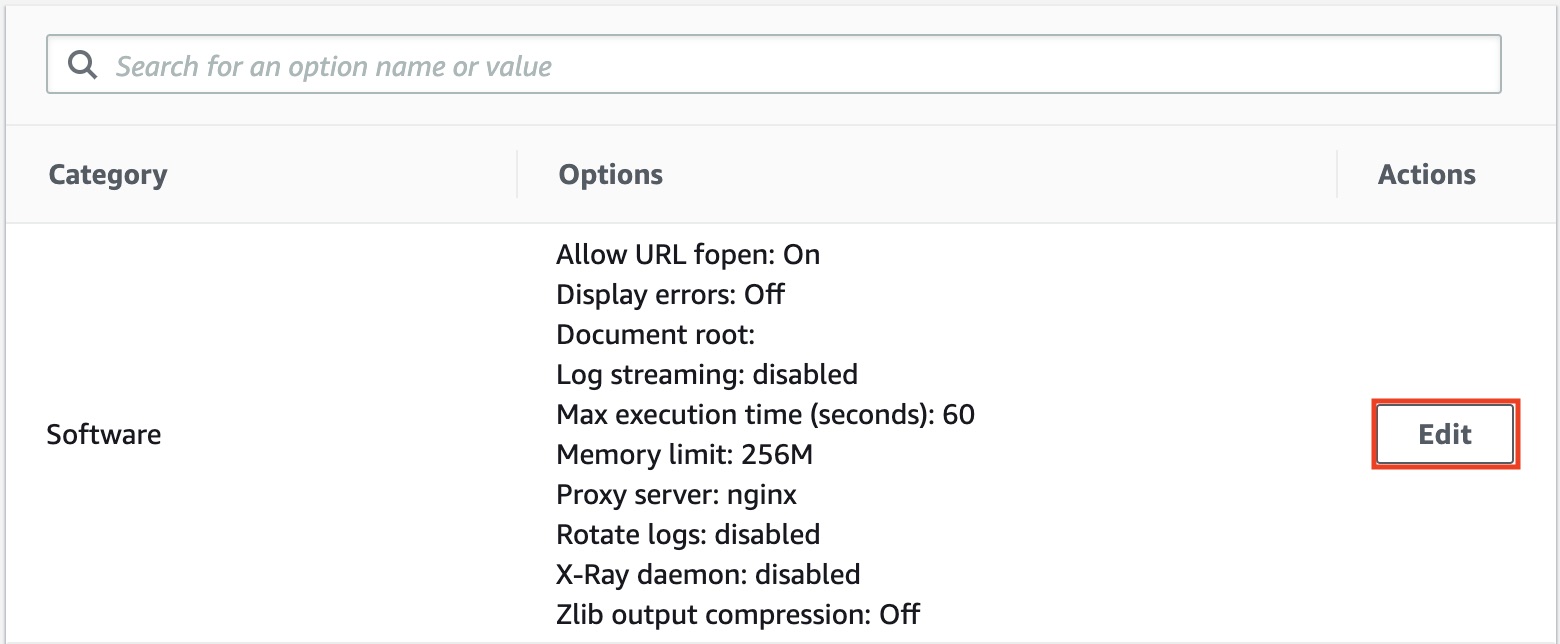
- Type your document root directory. (e.g. “/public”).
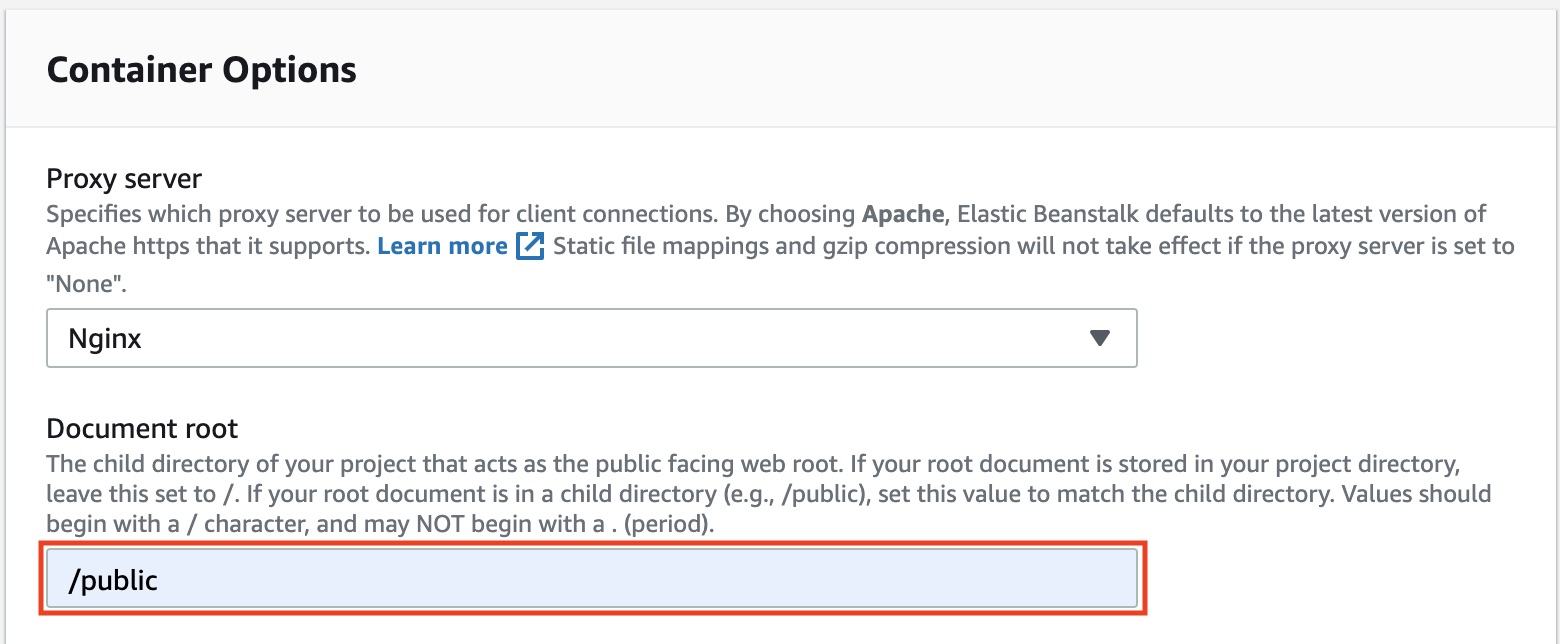
- Scroll to the bottom of the screen and click “Apply”.
- Wait for the application to finish rebuilding then visit your site’s URL again to verify the configuration.
Congratulations! You now have an application that’s running on the AWS cloud that took only a few simple steps to launch.
Terminating an AWS Elastic Beanstalk Application
To terminate your application, simply go to your AWS Elastic Beanstalk main page, select the “Actions” menu, and click the “Terminate environment” link.
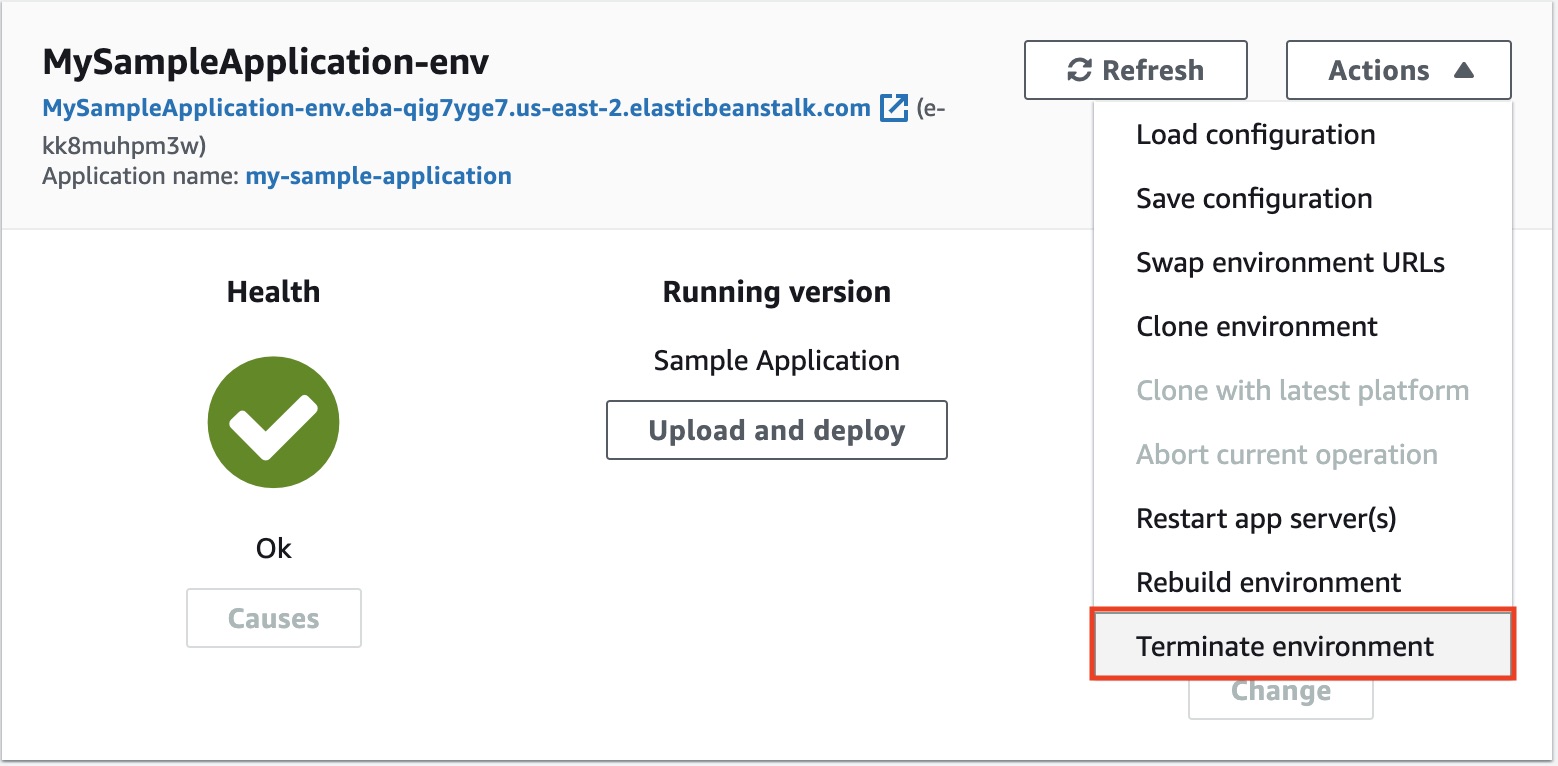 Your application along with all the associated resources generated by Elastic Beanstalk will be removed.
So now you know the basics of setting up and taking down a PHP application with AWS Elastic Beanstalk. AWS Elastic Beanstalk serves as a good starting point to learn AWS. From this point, you can continue learning about other AWS services to fine-tune your application to your needs.
To learn more about AWS Elastic Beanstalk, you can visit the following AWS websites:
https://aws.amazon.com/elasticbeanstalk/?nc2=type_a
https://aws.amazon.com/blogs/aws/category/aws-elastic-beanstalk/