Optimizing PHP Applications in Docker with New Relic APM
In this current time, our lives revolve around and rely on modern technology. Websites and applications play a major role from the simplest chore of ordering something we like or booking tickets online, to streaming videos, playing games, browsing and many more. We also use application tools that make us more productive at work, as well as applications that keep us connected with friends, family, and colleagues. And we expect them to perform and work flawlessly all the time.
Think about the last time you’ve used an application and experienced poor performance. Did you try to use the application again, or did you simply move on just like most consumers would?
When an application experiences performance issues, or is unavailable, there is a risk of losing customers.

What is APM?
APM stands for Application Performance Monitoring. It is a set of tools, practices, and processes used to monitor and manage the performance and availability of software applications. APM solutions provide insights into various aspects of an application’s behavior and performance metrics, such as response times, error rates, resource usage, and user interactions. It provides visible information and tools needed to ensure that applications meet performance expectations and deliver a high-quality user experience.
Benefits of APM
APM provides several advantages for businesses and IT professionals. Here are some key benefits:
- Enhanced Performance and Reliability
- Improved User Experience
- Increased Developer Productivity
- Business Insights
- Cost Efficiency
- Scalability
- Compliance and Security
- Enhanced Collaboration
New Relic APM
New relic is among the many companies that provide a suite of products for software and application monitoring. Their tools offer comprehensive visibility into the performance and health of applications, enabling proactive management and continuous improvement for optimal performance.
Its platform offers a range of tools to help developers, IT operations, and business leaders understand and improve their software performance.
They also offer a lot of service. Please feel free to browse to their website for more information.
Setup New Relic APM on Docker project
This blog will only cover the usage and guide on how to setup and use New relic’s APM on our PHP projects running on docker.
To install the New relic agent for applications running in docker containers, you’ll need to follow these general steps:
1. Create a New Relic account
If you haven’t already, sign up for a New relic account on their website.
2. Generate a License Key
Once you have your account, you’ll get a license key which you’ll need to integrate New relic with your application.
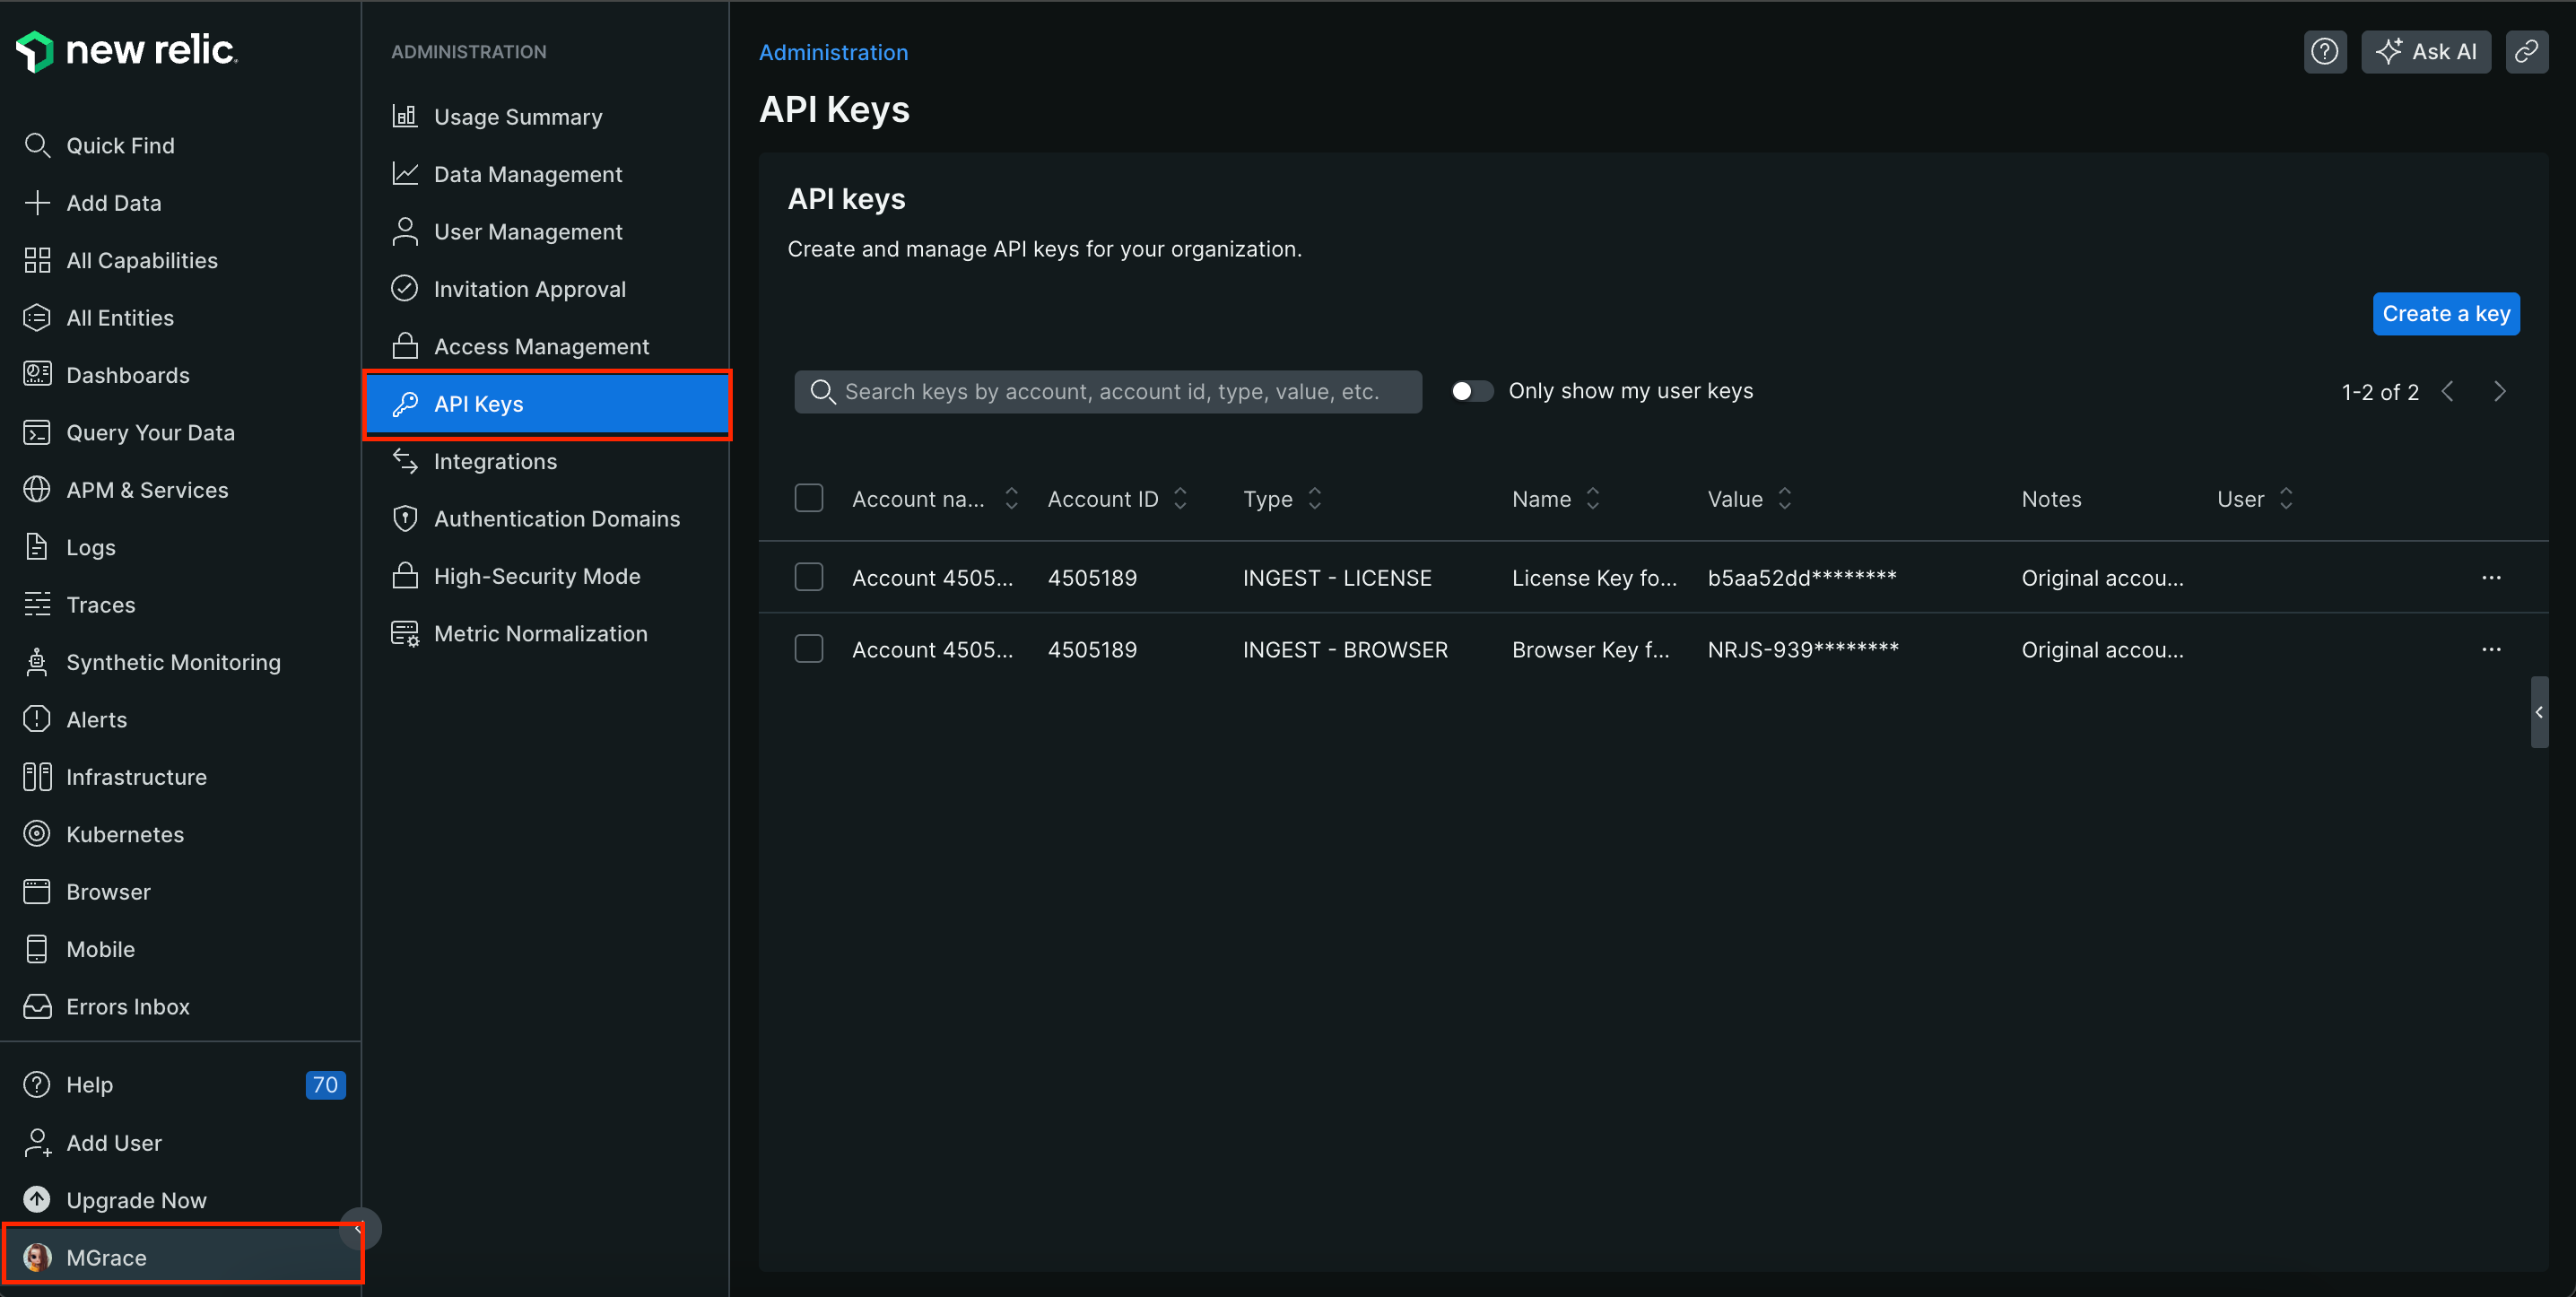
Once logged in, navigate to the API Keys section in your account settings.
Generate a new license key if you haven’t already.
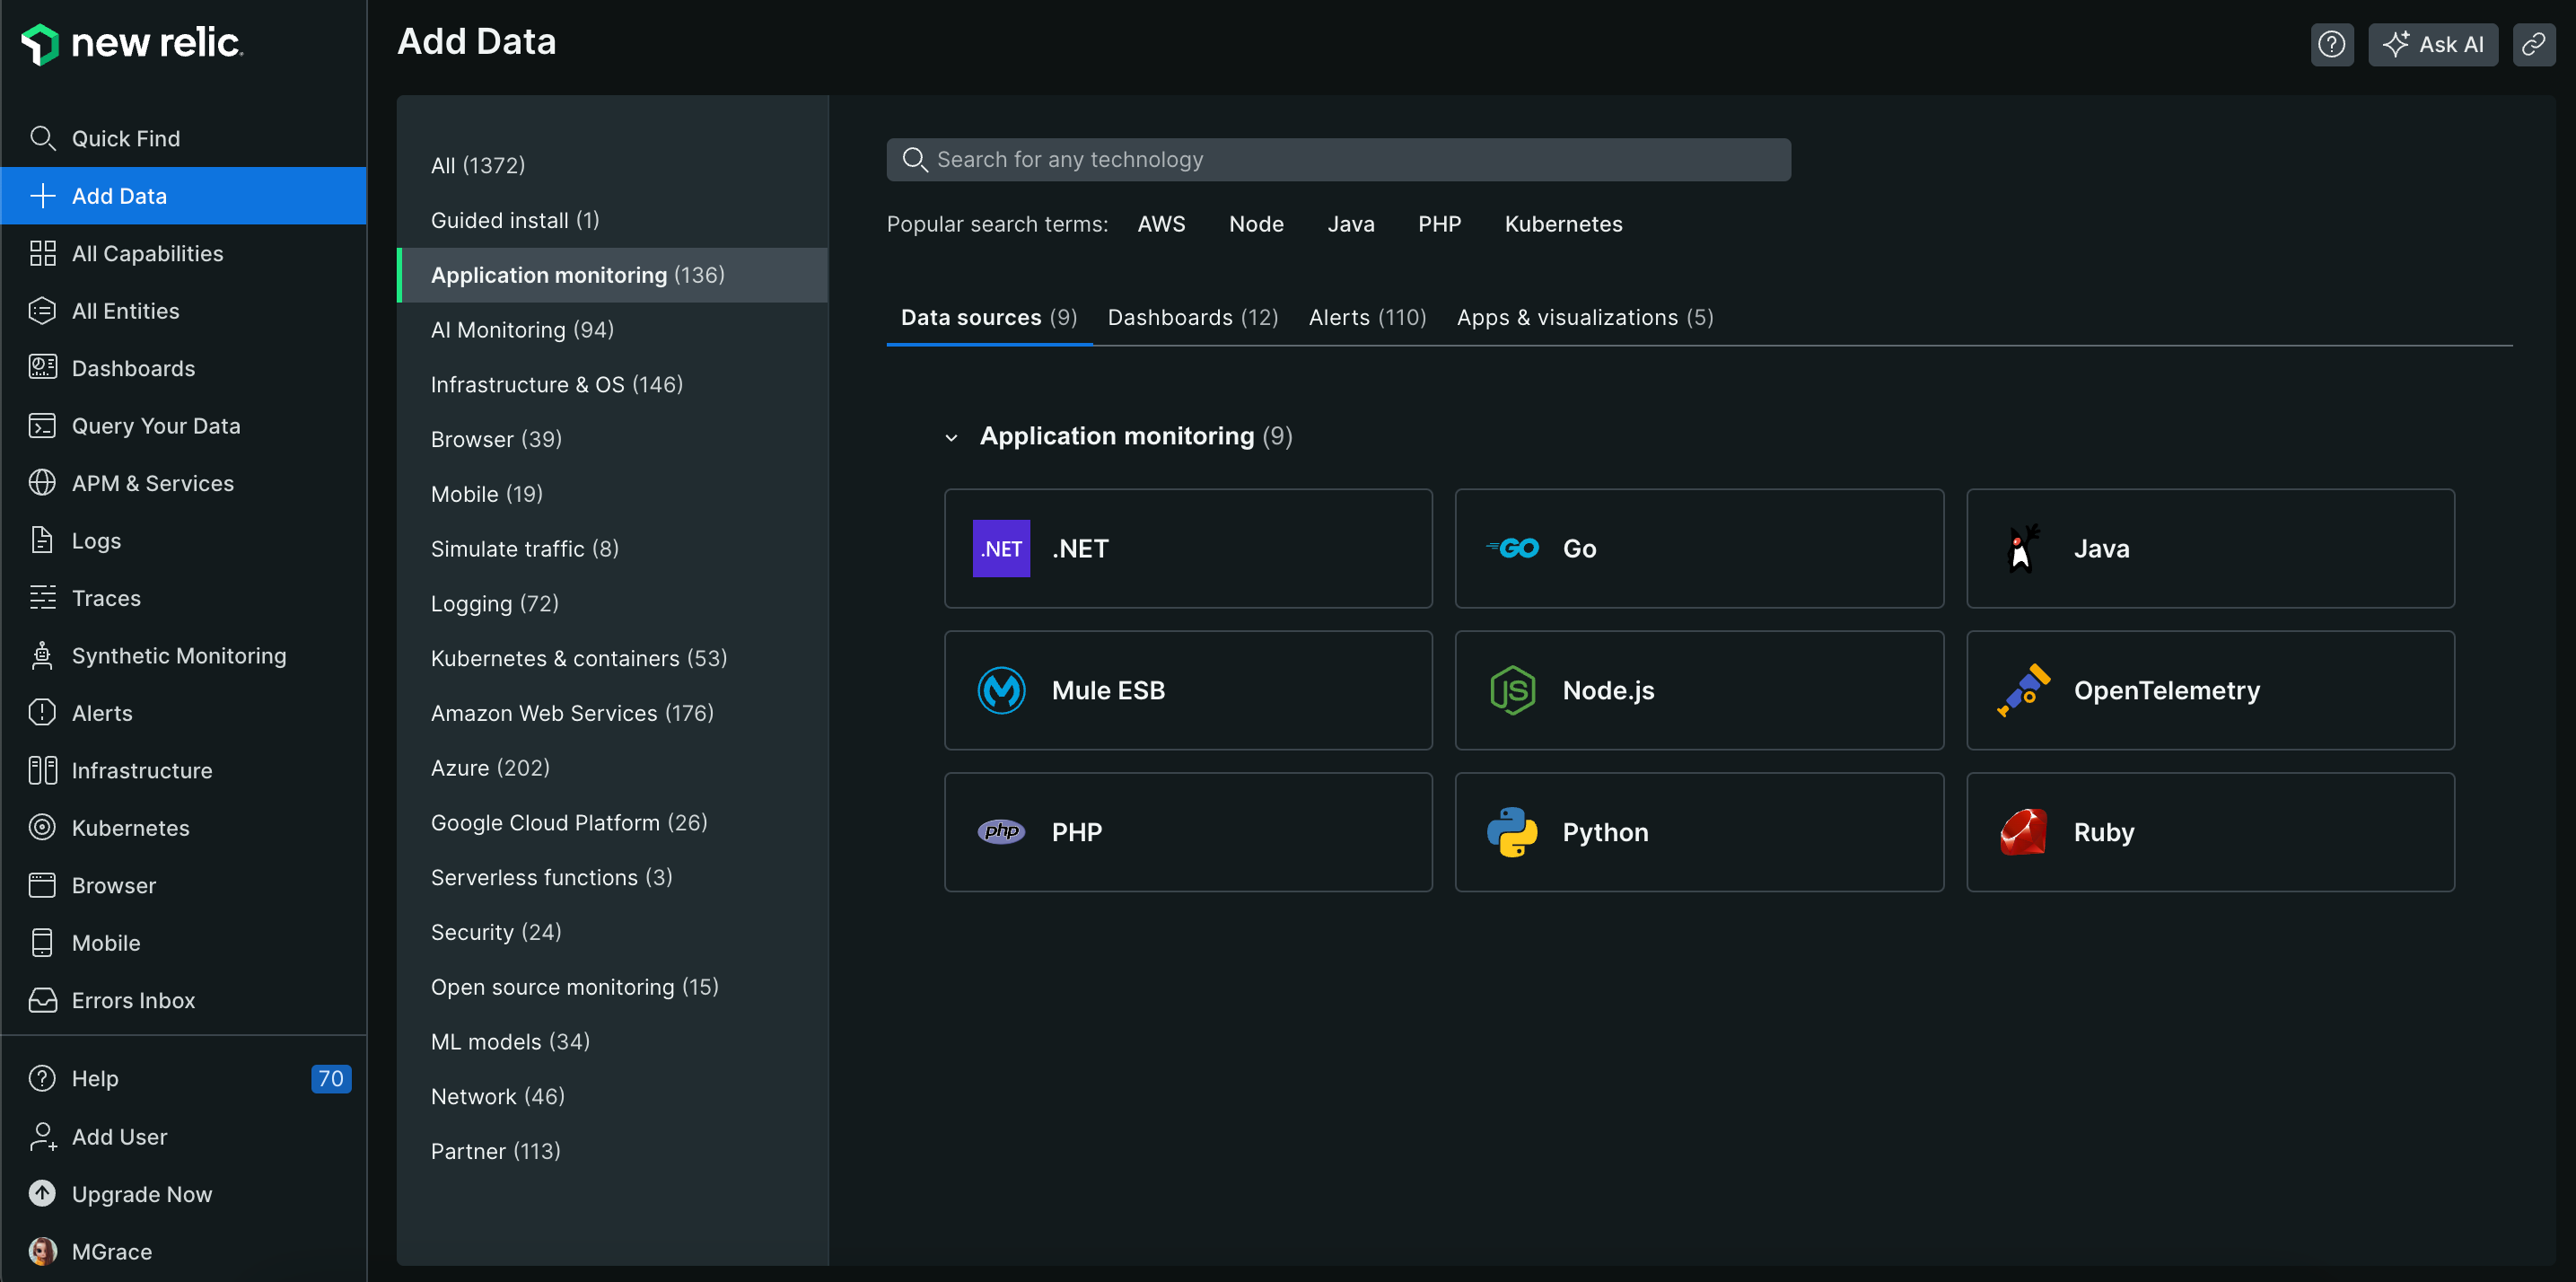
3. Choose the Agents
New Relic offers agents for various programming languages (e.g., Python, Java, Node.js). Choose the appropriate agent based on the language your application is written in.
Click on the APM & Services menu, then add an app or service.
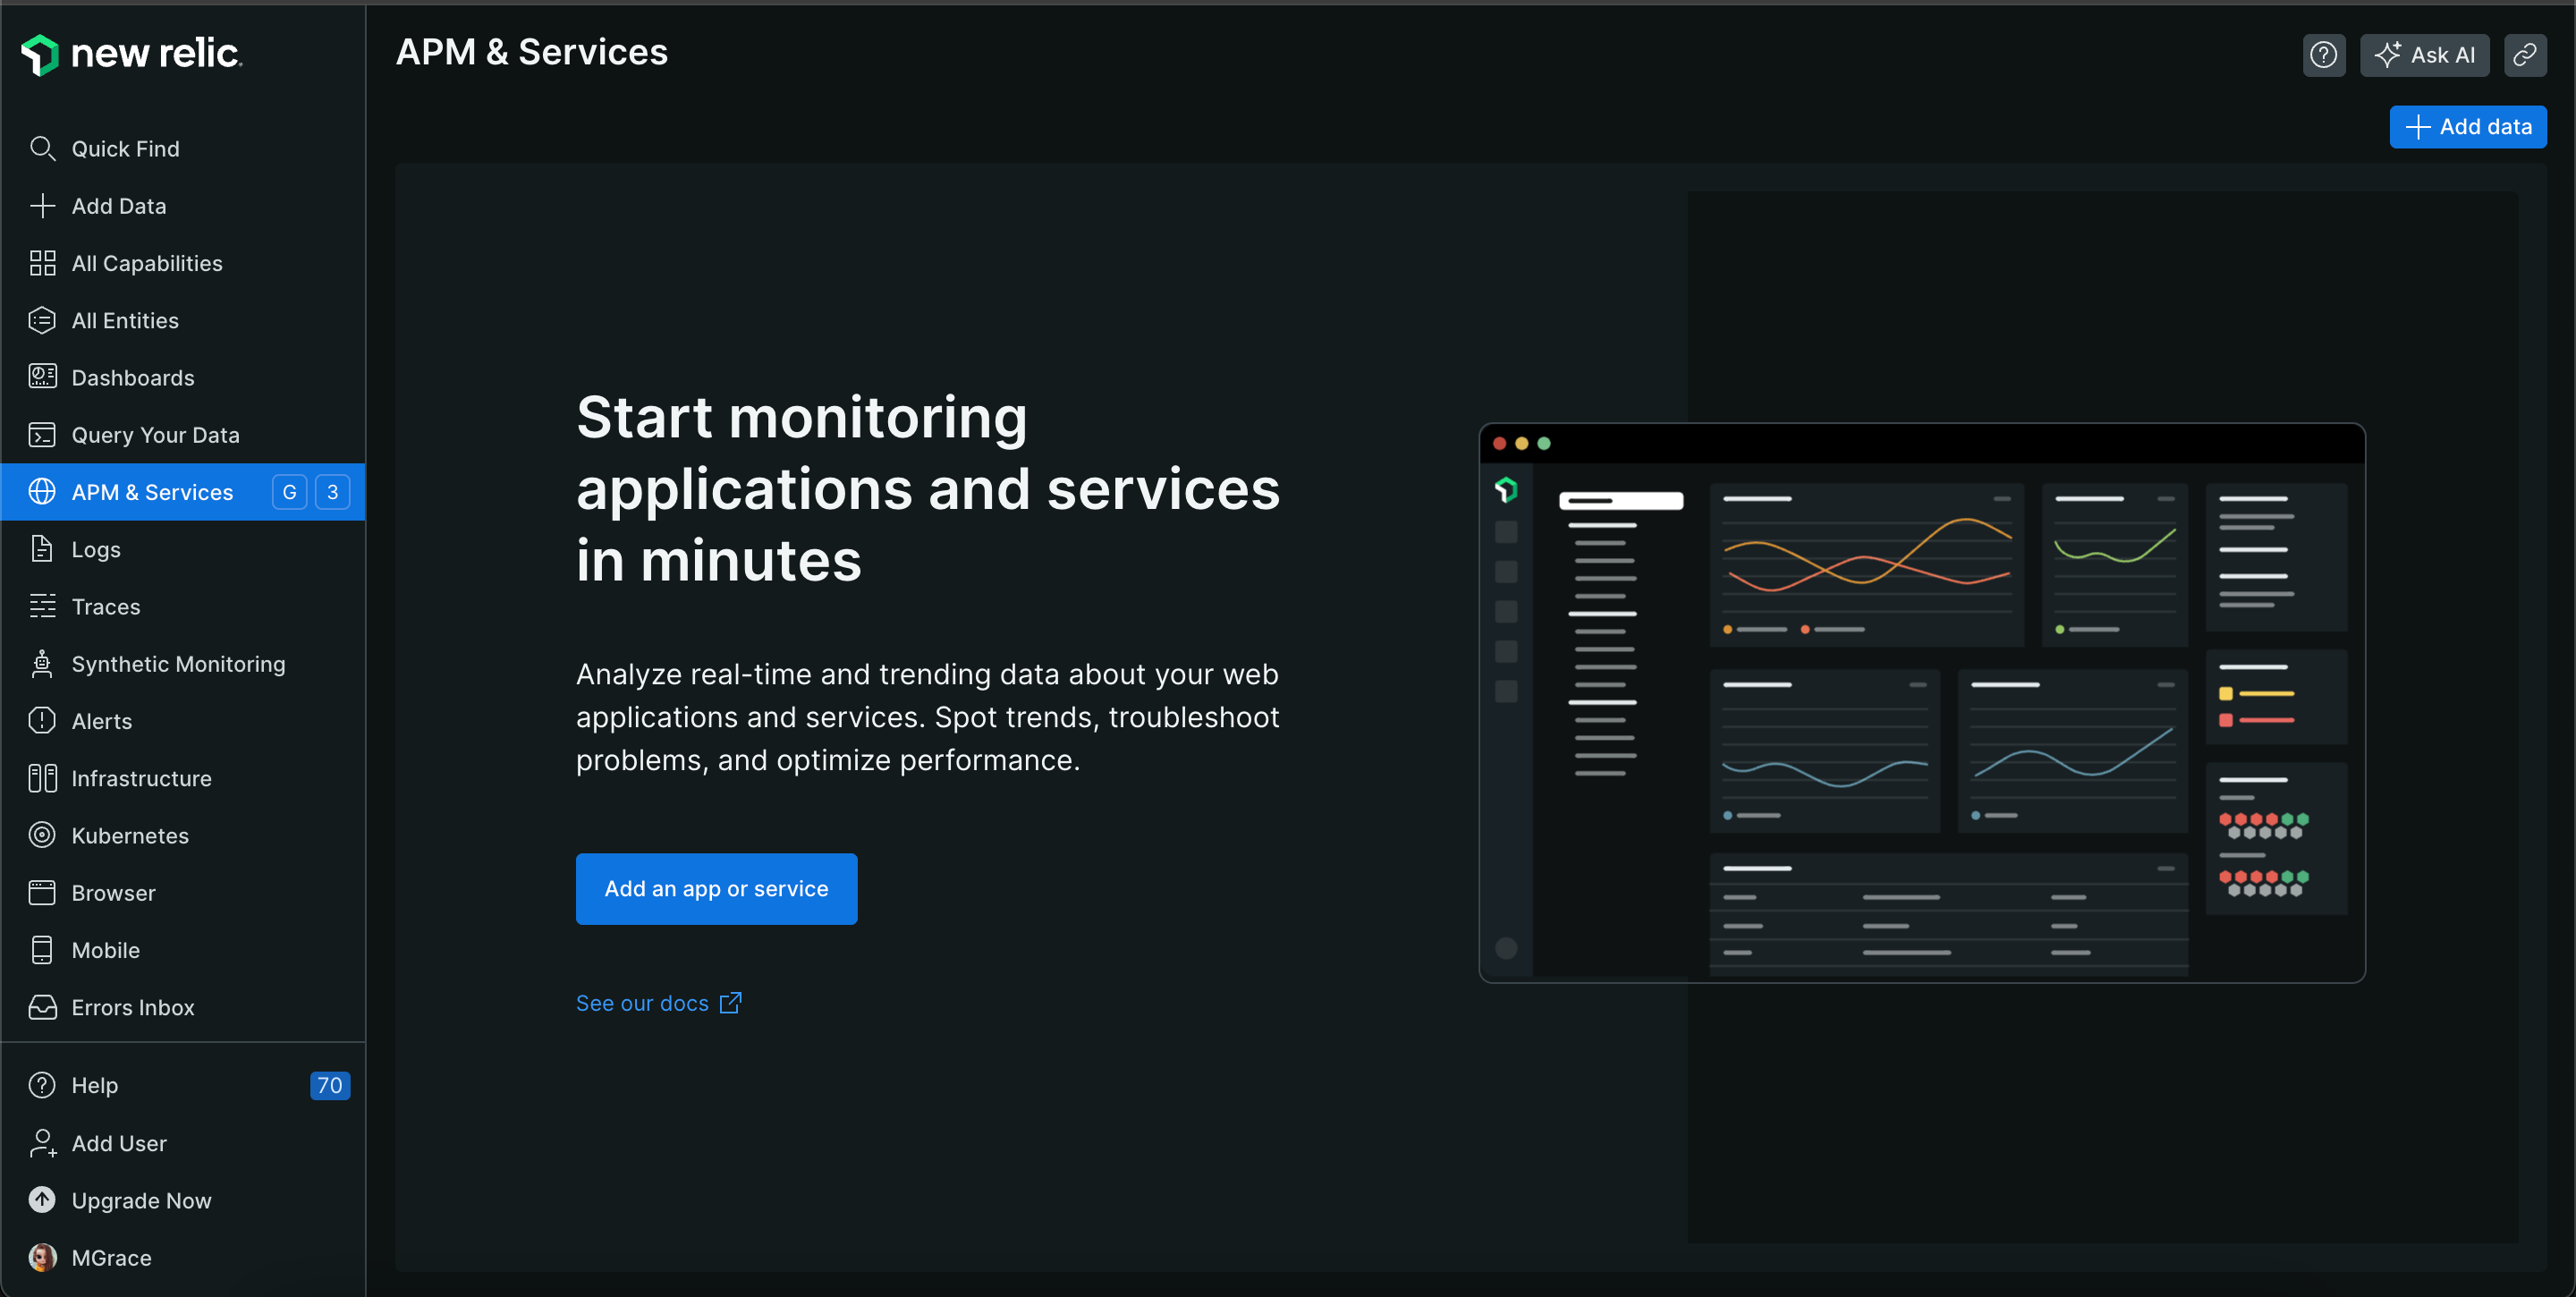
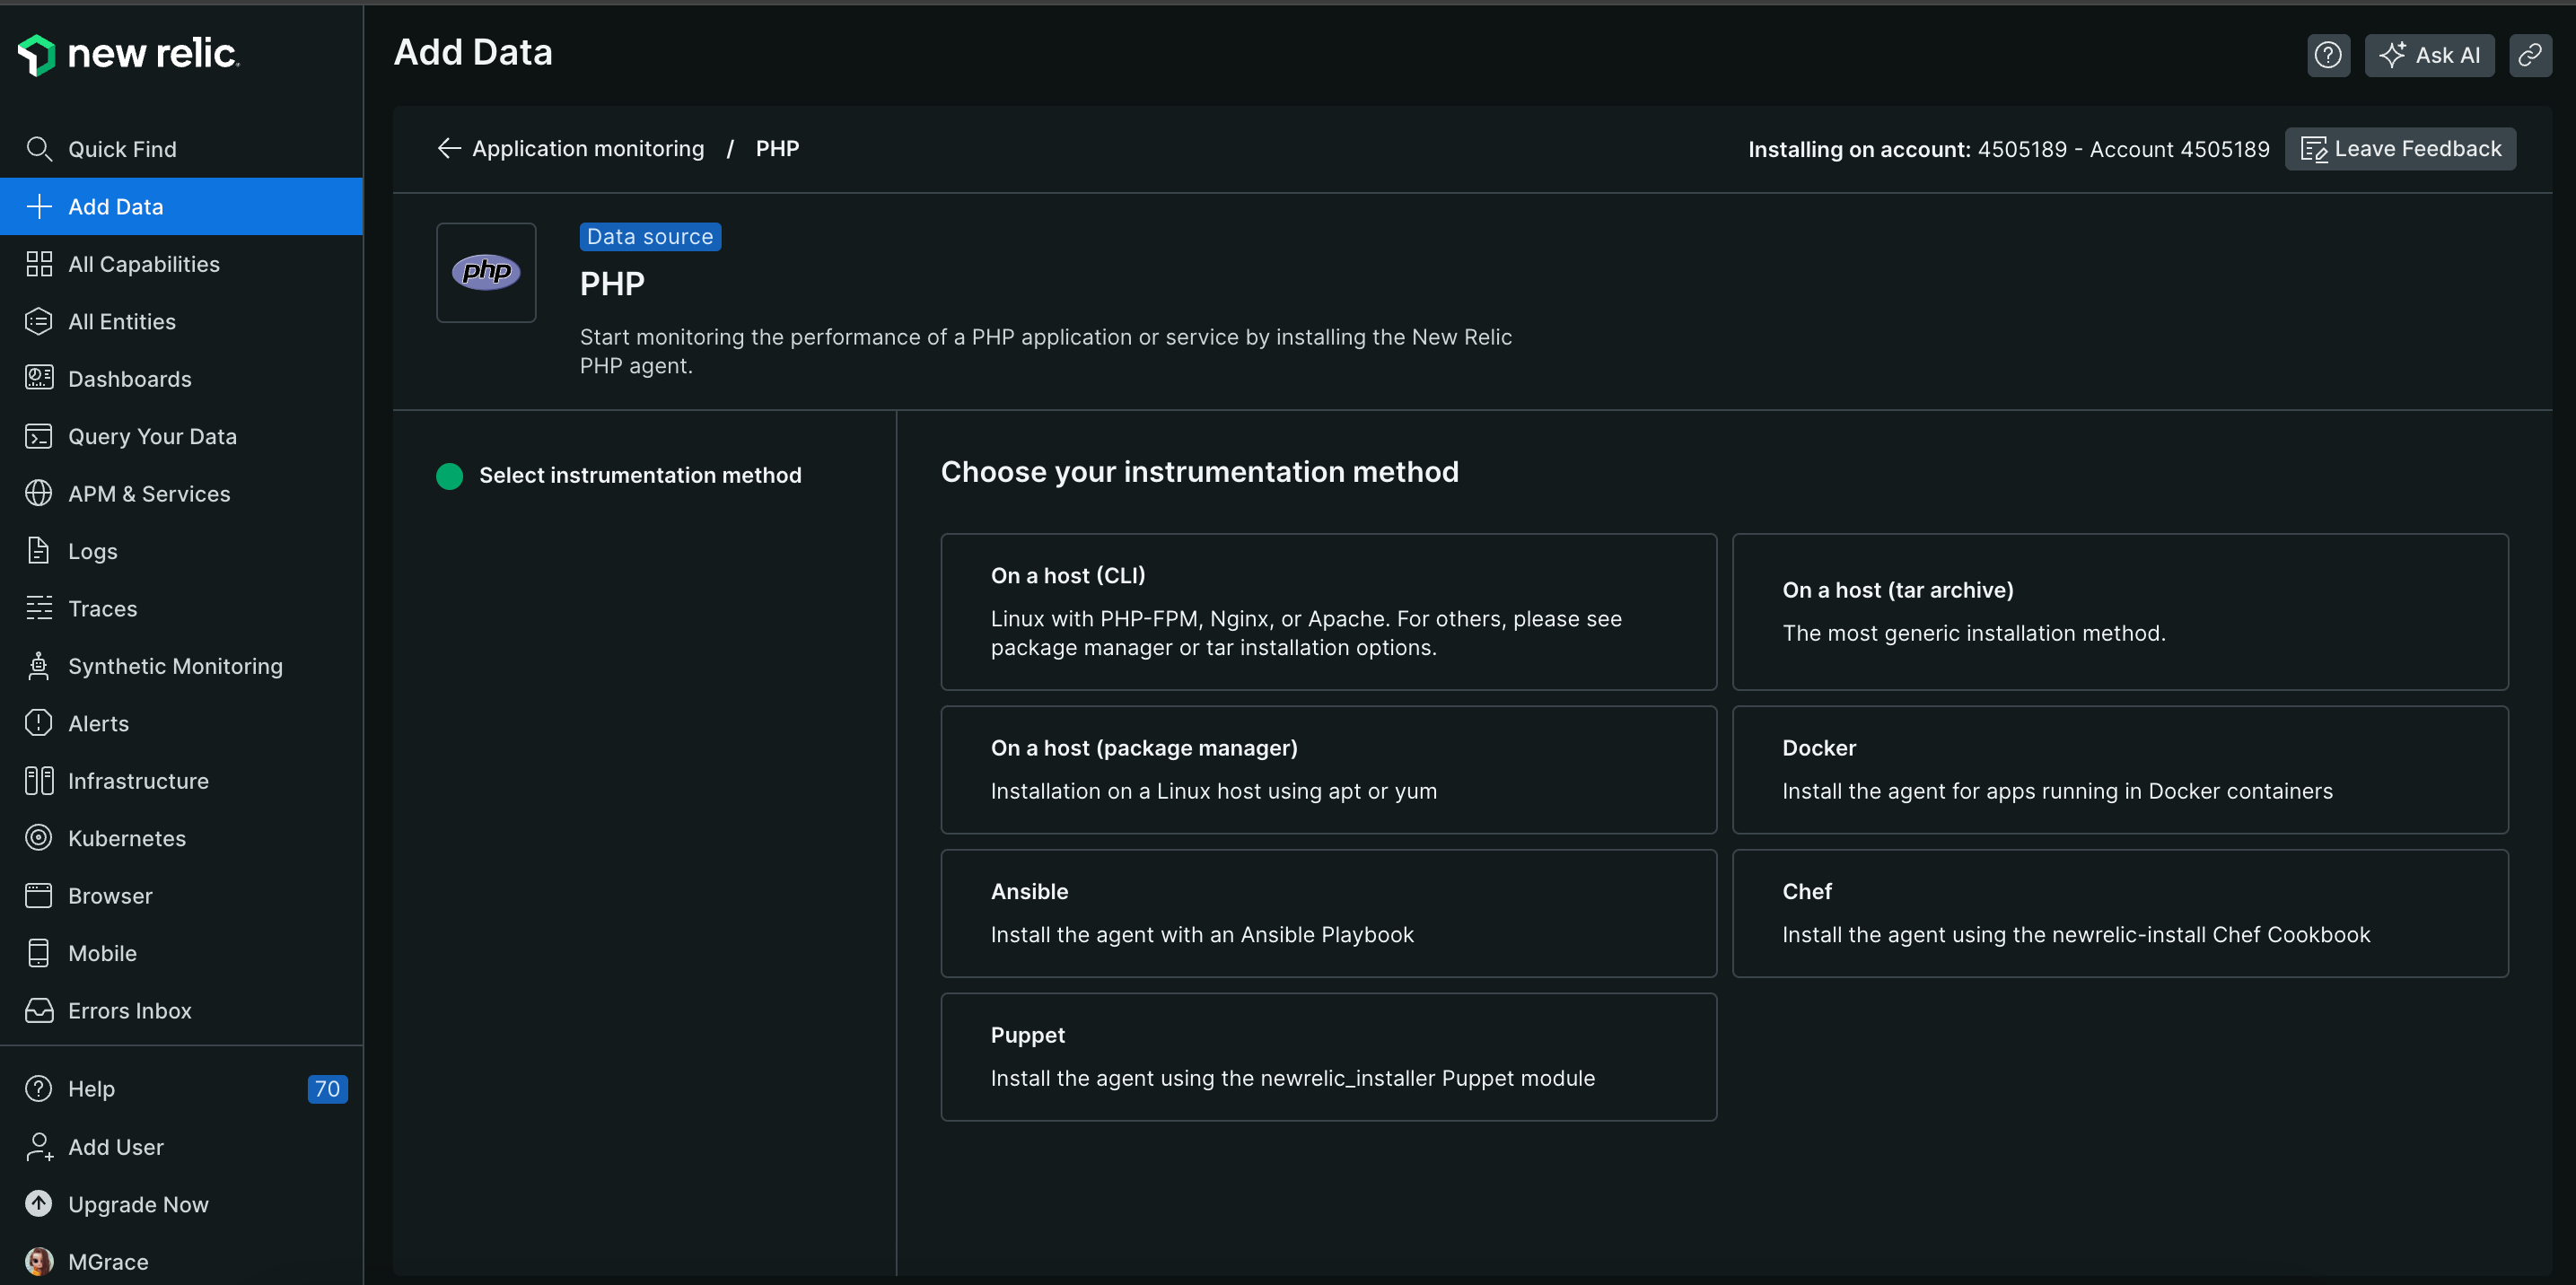
APM includes setup instructions you can follow based on your selected agent and method. Feel free to go along with their setup instructions.
But we will cover and create our own setup and let docker automatically add the agent to our New relic account based on our application, which is PHP and monitor its performance.
4. Code Setup
This APM article assumes you already have the source code for your PHP application.
5. Set Environment Variables
We have to update the .env file of our project and add some environment variables needed to install newrelic agent on our base docker container.
   # New relic
   NEW_RELIC_ENABLED=true
   NEW_RELIC_AGENT_VERSION=10.17.0.7
   NEW_RELIC_LICENSE_KEY=xxxxxxxxxxxxxxxxxxxxxxxxx
   NEW_RELIC_APP_NAME=admatrix-dsp-local
NEW_RELIC_ENABLED: allows us to enable/disable New relic application monitoring. This option is needed especially if our application is running on multiple servers where we only want to run APM on some of the servers and not all.NEW_RELIC_AGENT_VERSION: the version we want to use.NEW_RELIC_LICENSE_KEY: the license key we generated on item #2 mentioned above.NEW_RELIC_APP_NAME: the application name we want to use and display on our New relic APM page.
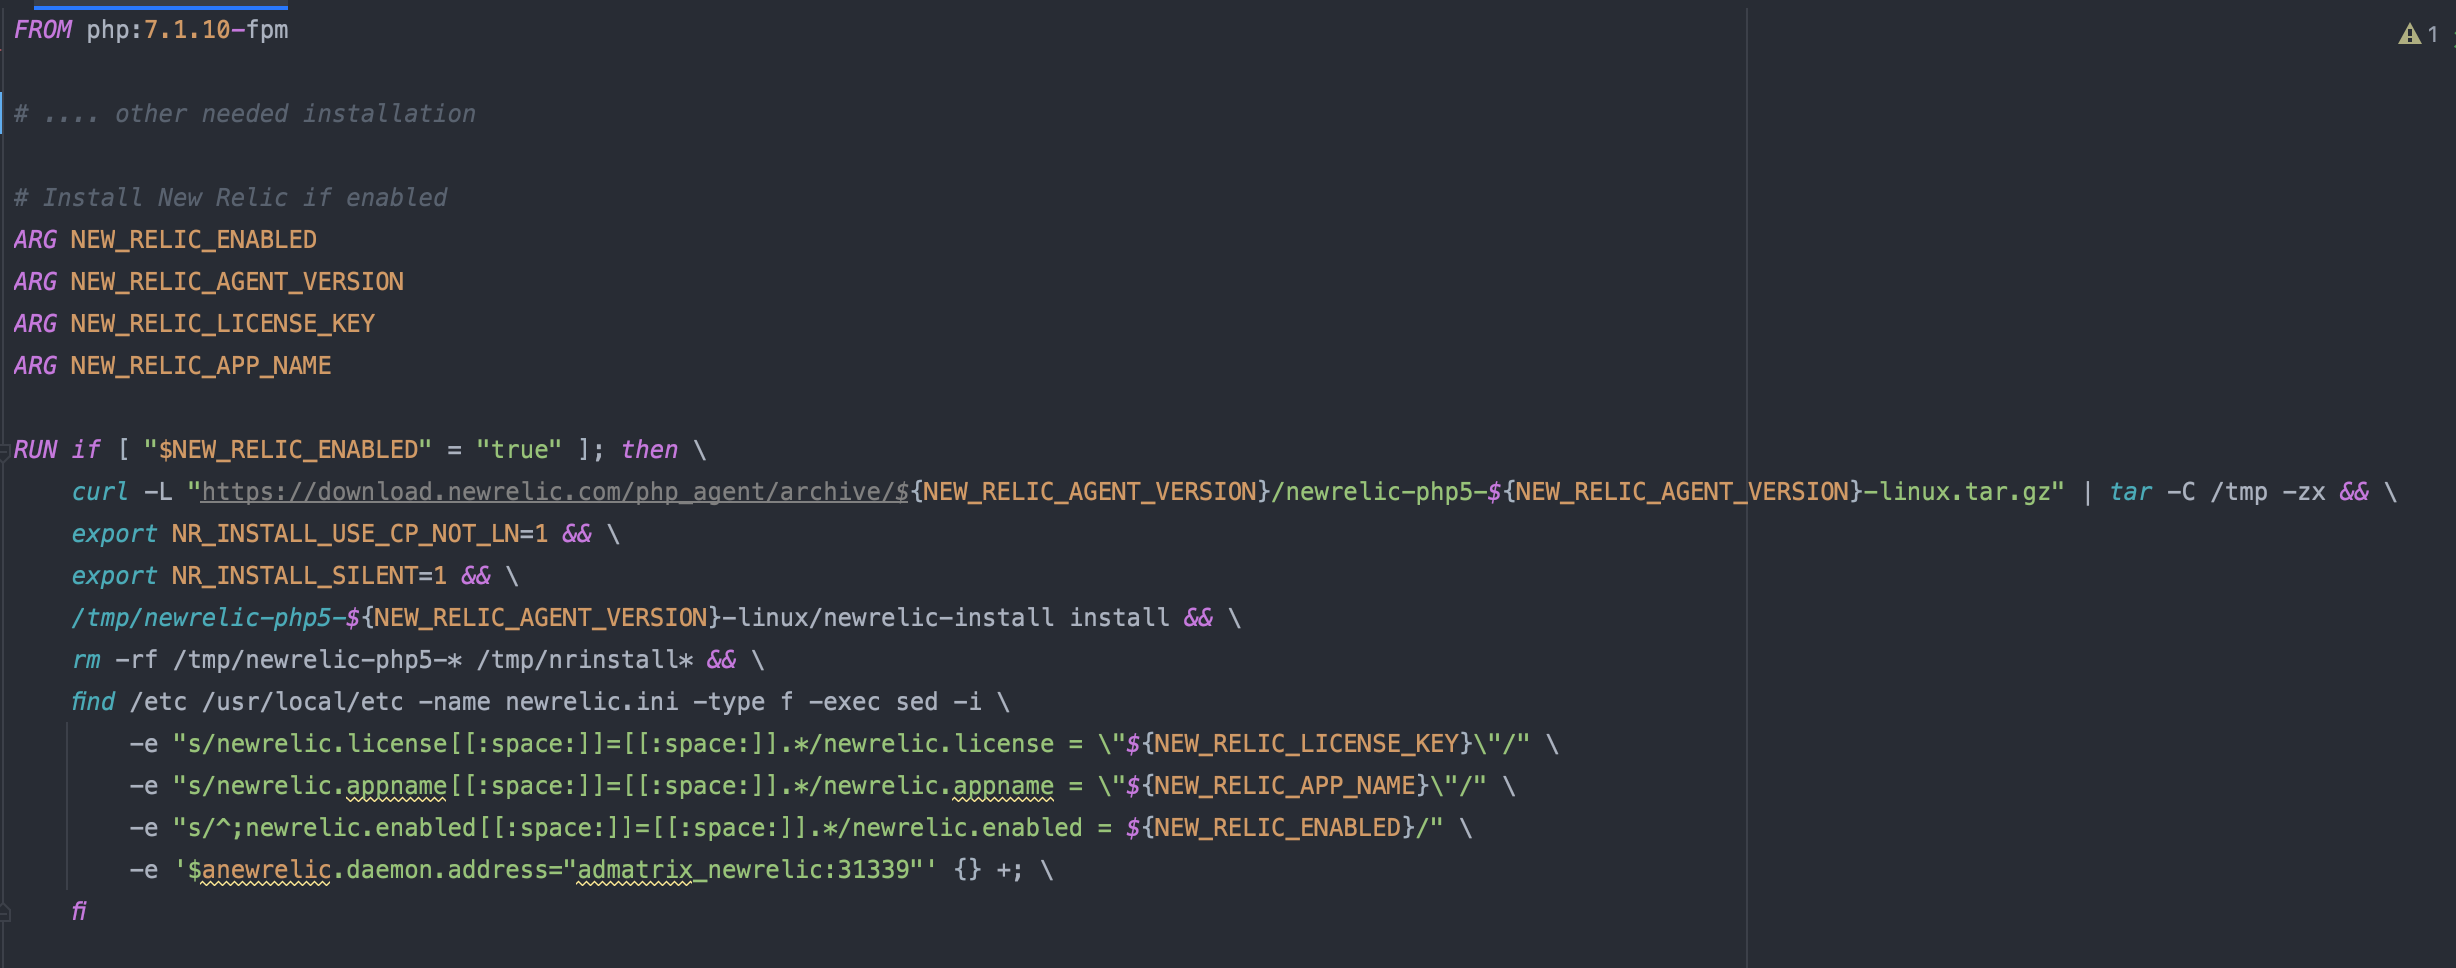
6. Create base Dockerfile
This setting depends on how our docker projects are set up. Fow now, we are using base images that are used by our docker containers. This base dockerfile is running on php and is used by our PHP application container as base image.
On our base dockerfile, add the following code so that our agent will be installed to our base docker image.
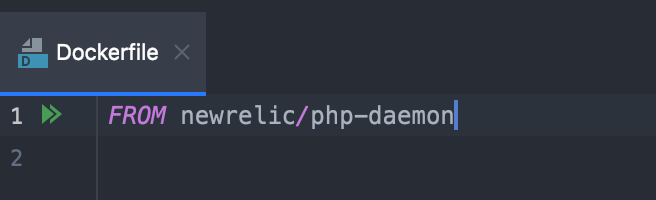
7. Custom Dockerfile for New Relic
We have to create a new dockerfile for New relic to install the demon. This will be used by our New relic base image.
Note: Usually, this can just be directly added as an image on our docker-compose file, but we prefer not to directly use newrelic/php-daemon as image on our docker-compose file because we wanted to unify our images with the descriptive name and version used.
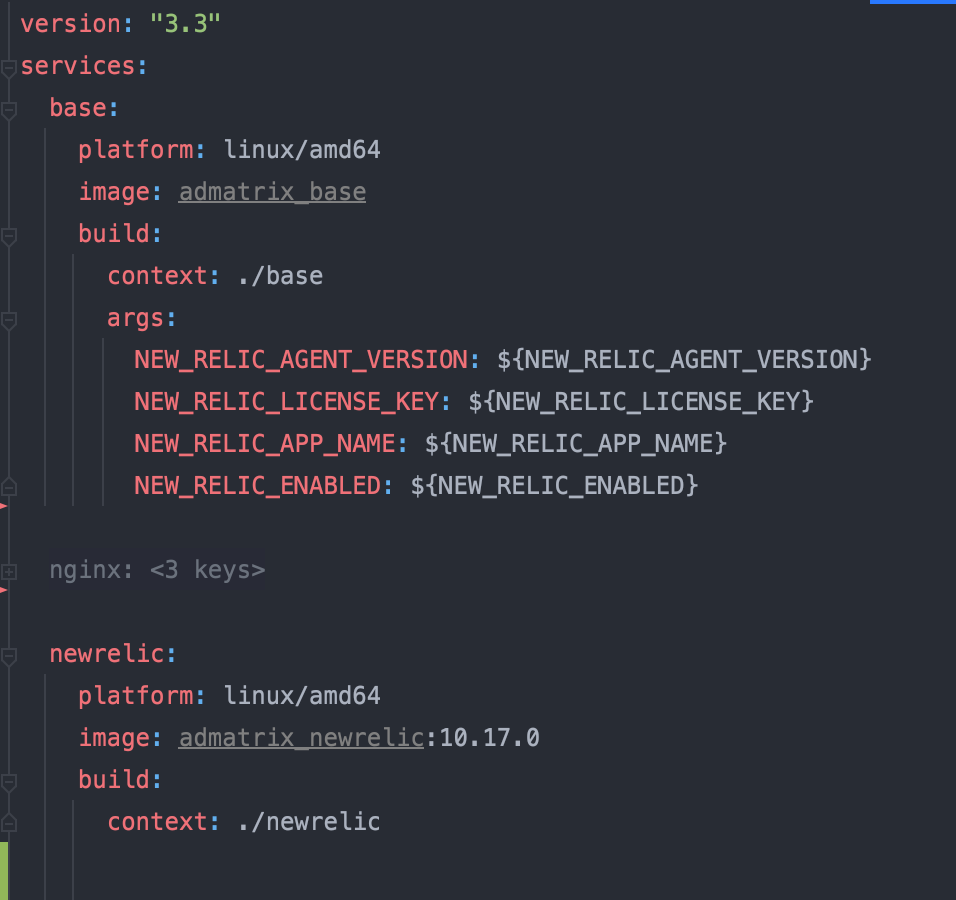
8. Create base docker-compose file
Create a docker-compose.base.yml file and add the base and New relic service as our base images.
9. Build Base Docker Image
Now that we have completed adding needed items for our base images, we now have to build these images.
Take note that our base docker-compose file name is docker-compose.base.yml. So we have to run the following command:
docker-compose -f docker-compose.base.yml build
Once successful, this should show our built images.
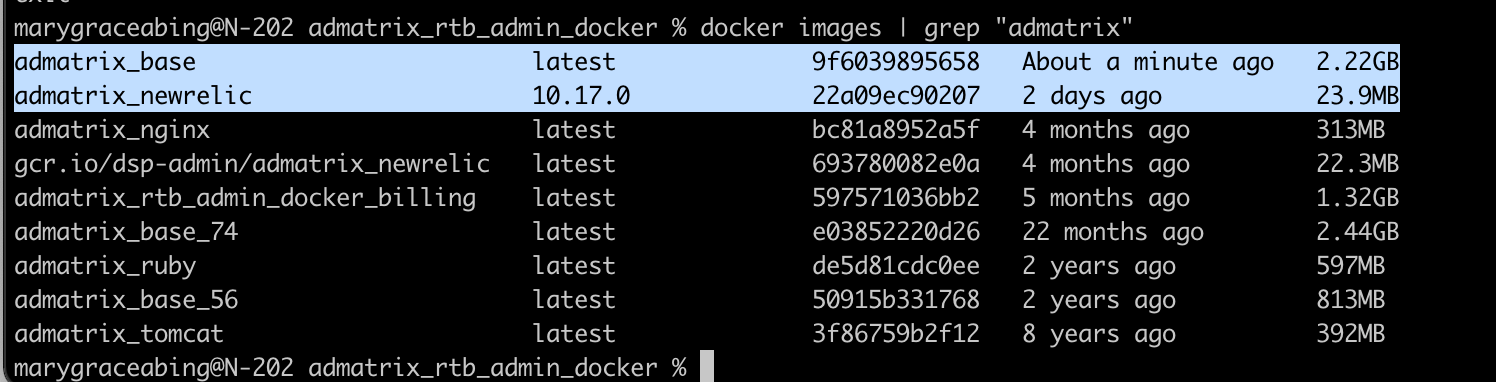
10. Custom docker-compose File
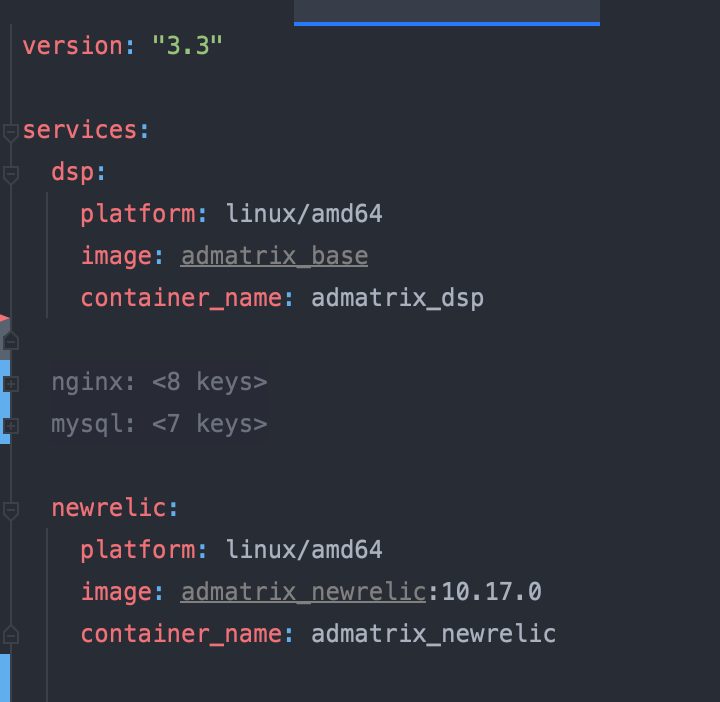
As we already have our base images built, we now have to set up our docker containers.
Create a docker-compose.yml file and add the needed service and make sure to use our previously built New relic base image. Don’t forget to add the PHP codes as volume to the PHP application container (this time dsp).
11. Build Docker Containers
Now to build our docker containers, run the following command:
docker-compose up -d
Once successful, this should show our built containers.
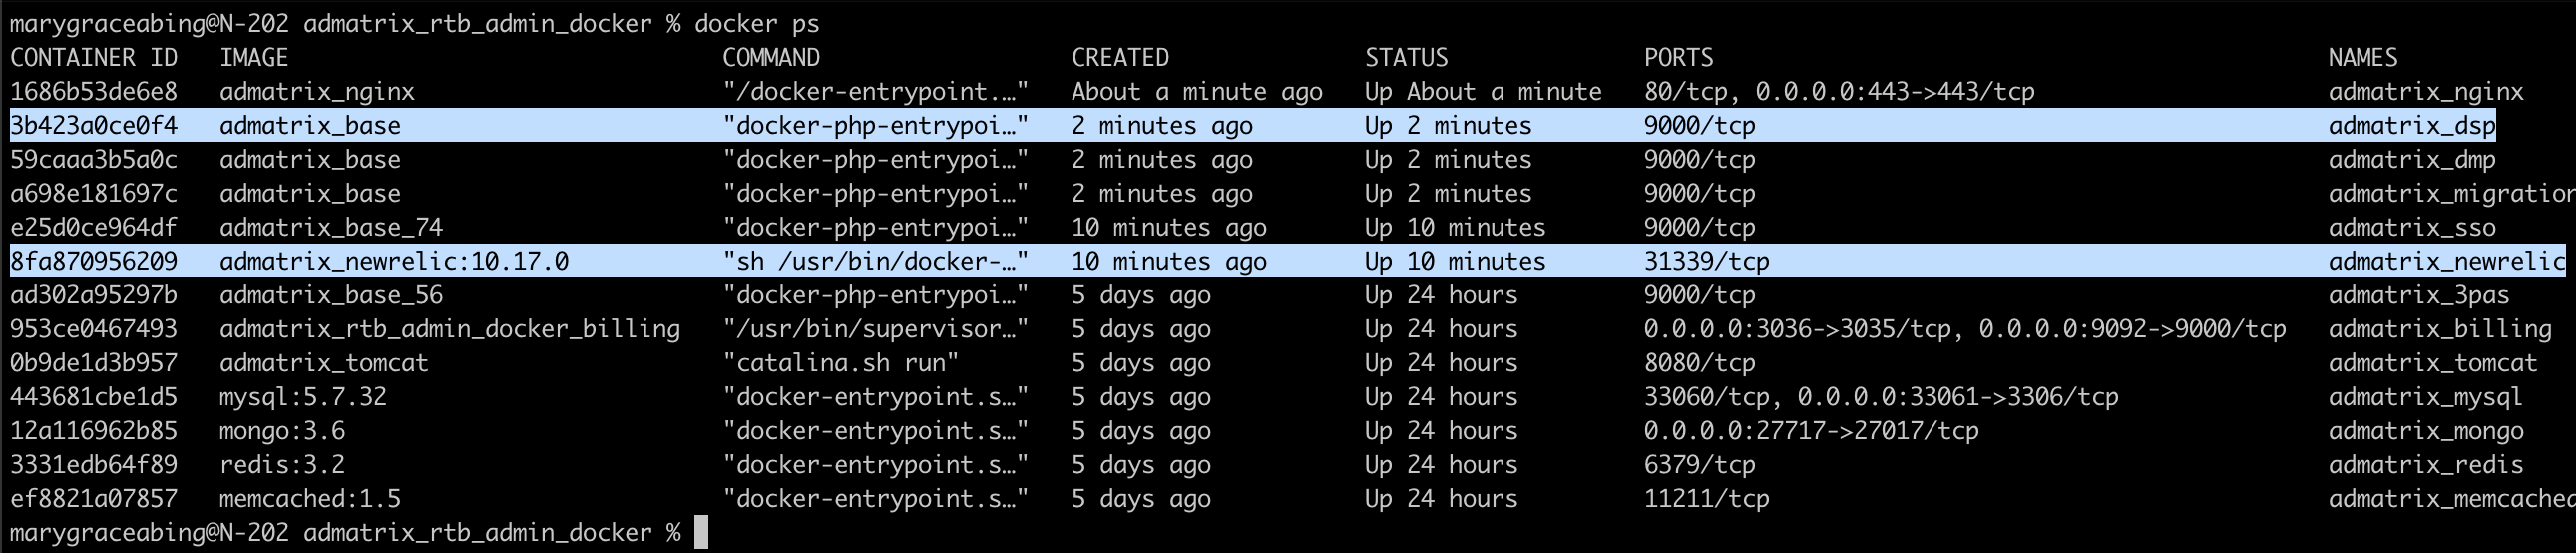
Based on our build containers, a new service admatrix_newrelic has been created using admatrix_newrelic:10.17.0 base image and our admatrix_dsp service is also using admatrix_base base image where we installed our New relic agent.
12. Installation Success Check
Check if our application successfully installed the New Relic APM.
Bash to your docker container and run the following command:
grep -E 'newrelic.appname|newrelic.license|daemon.address|newrelic.enabled' /usr/local/etc/php/conf.d/newrelic.ini
Now the result should be:

13. Check New Relic APM page
As we finally built our application docker setup, we now try to access our application url and try to access any pages or make any transaction you want.
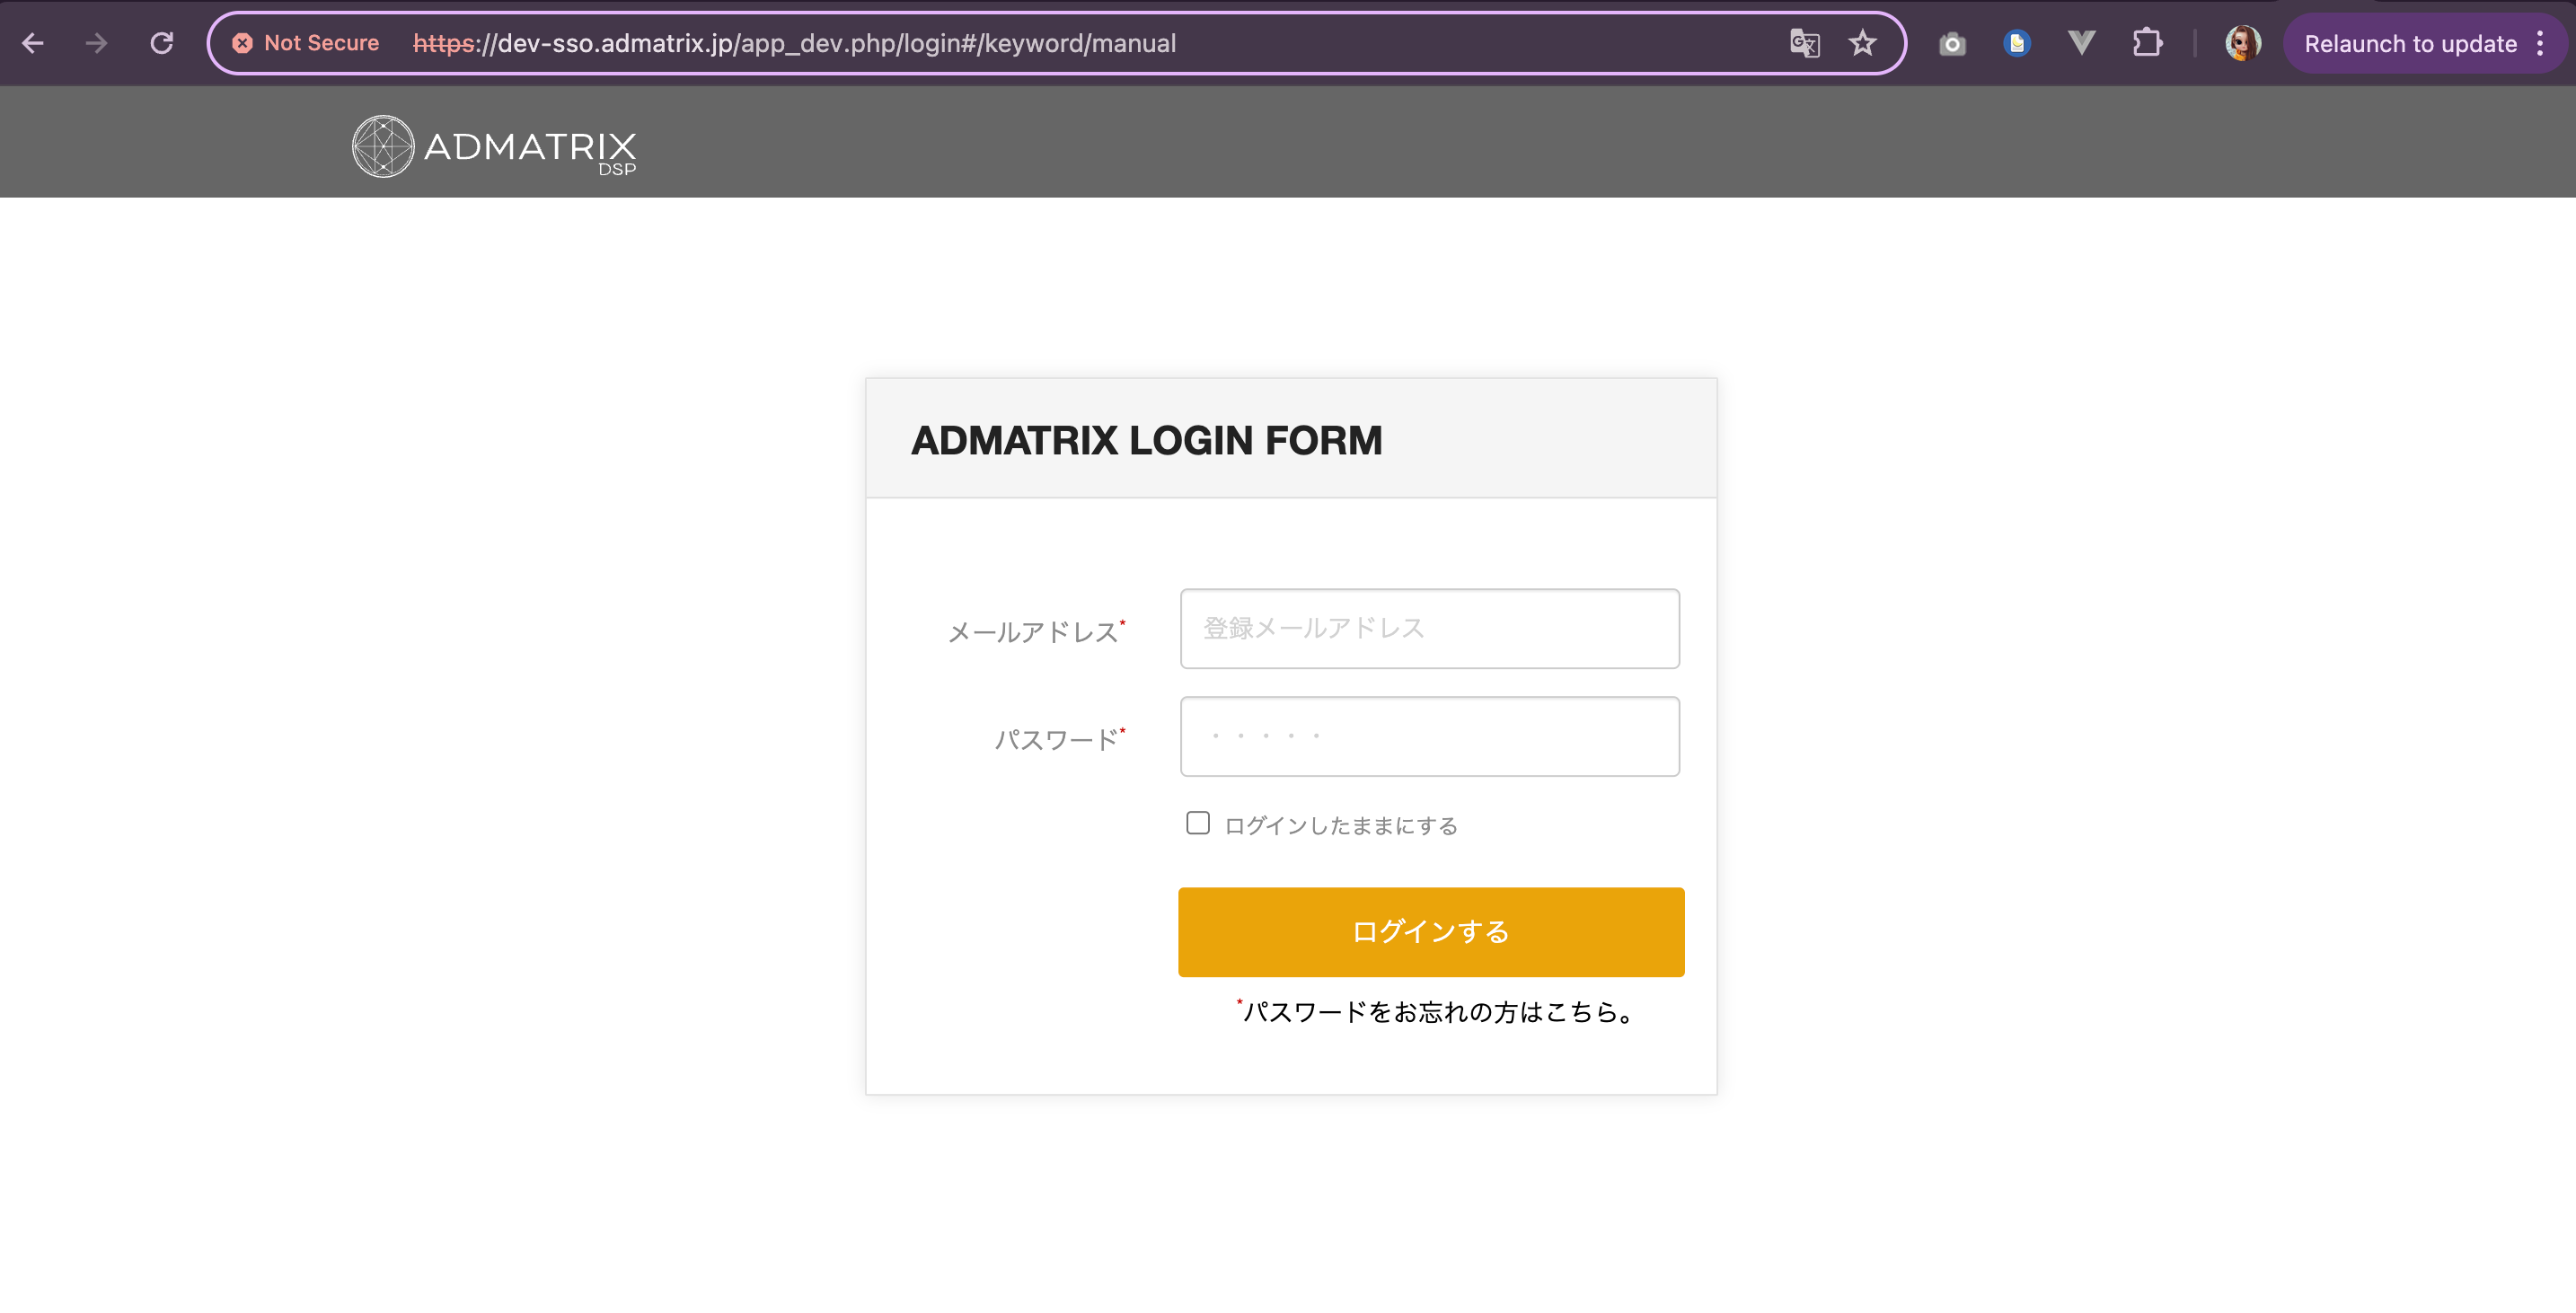
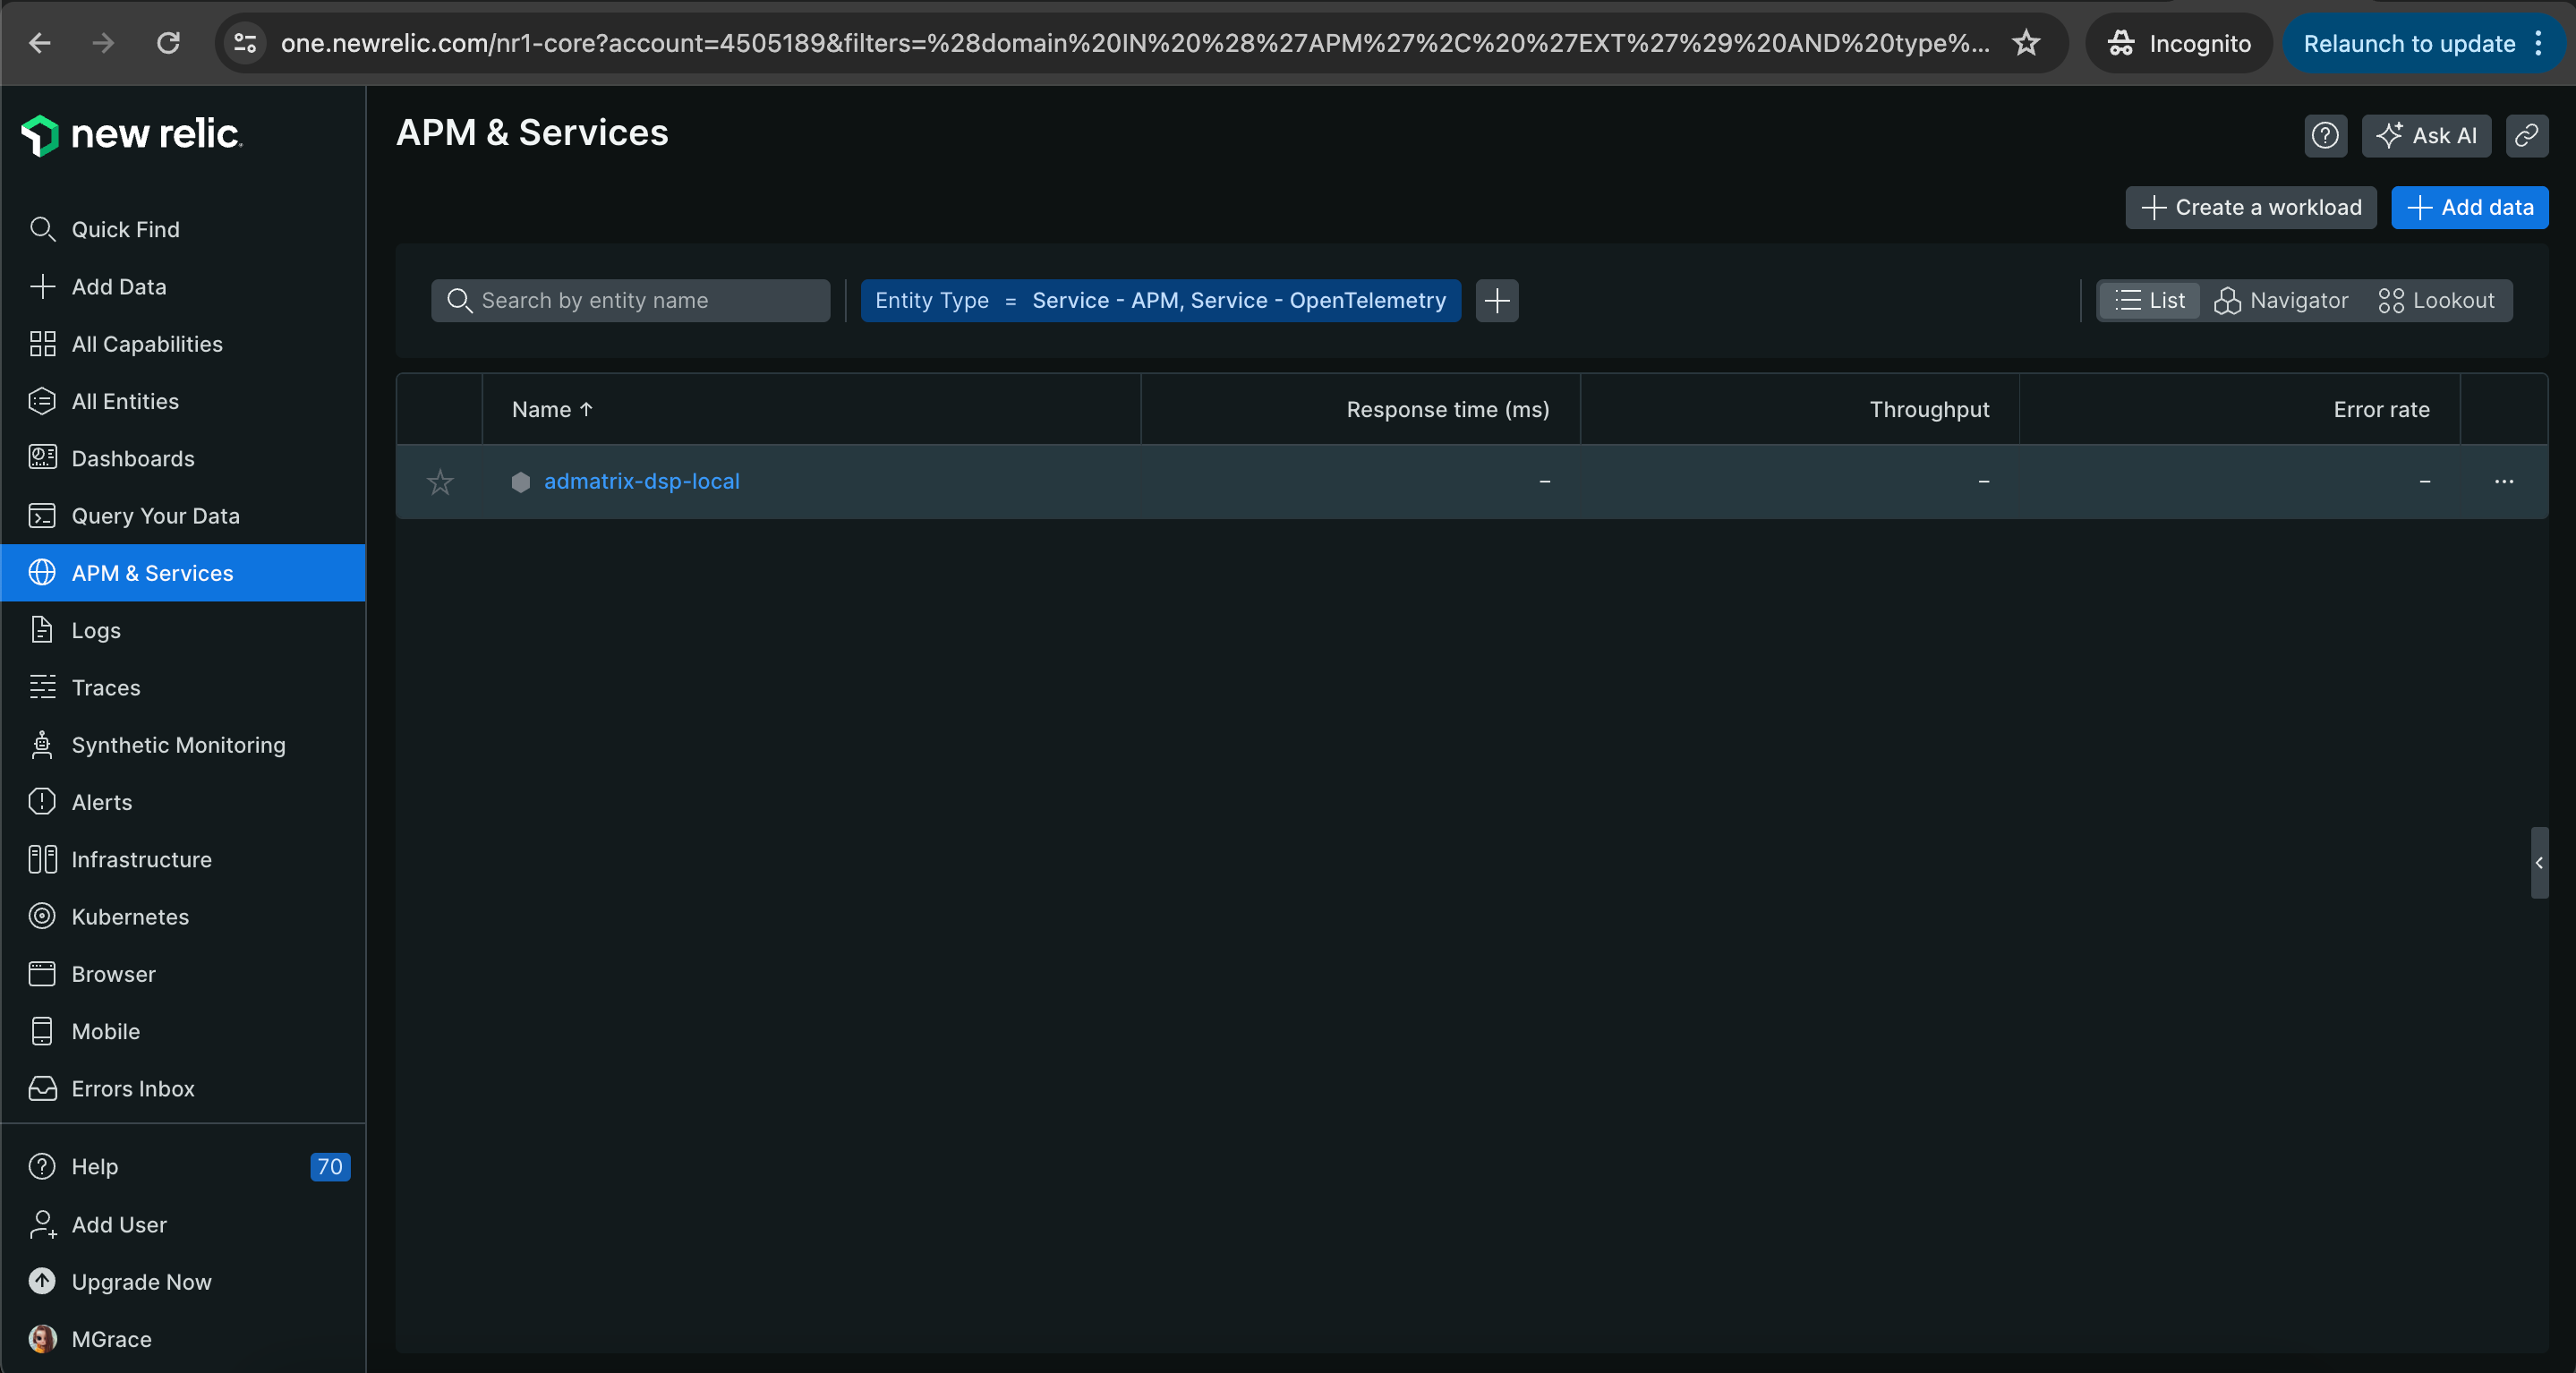
Now to verify if New relic will now monitor our application, head on to our New relic account page and click APM & Services on the menu.
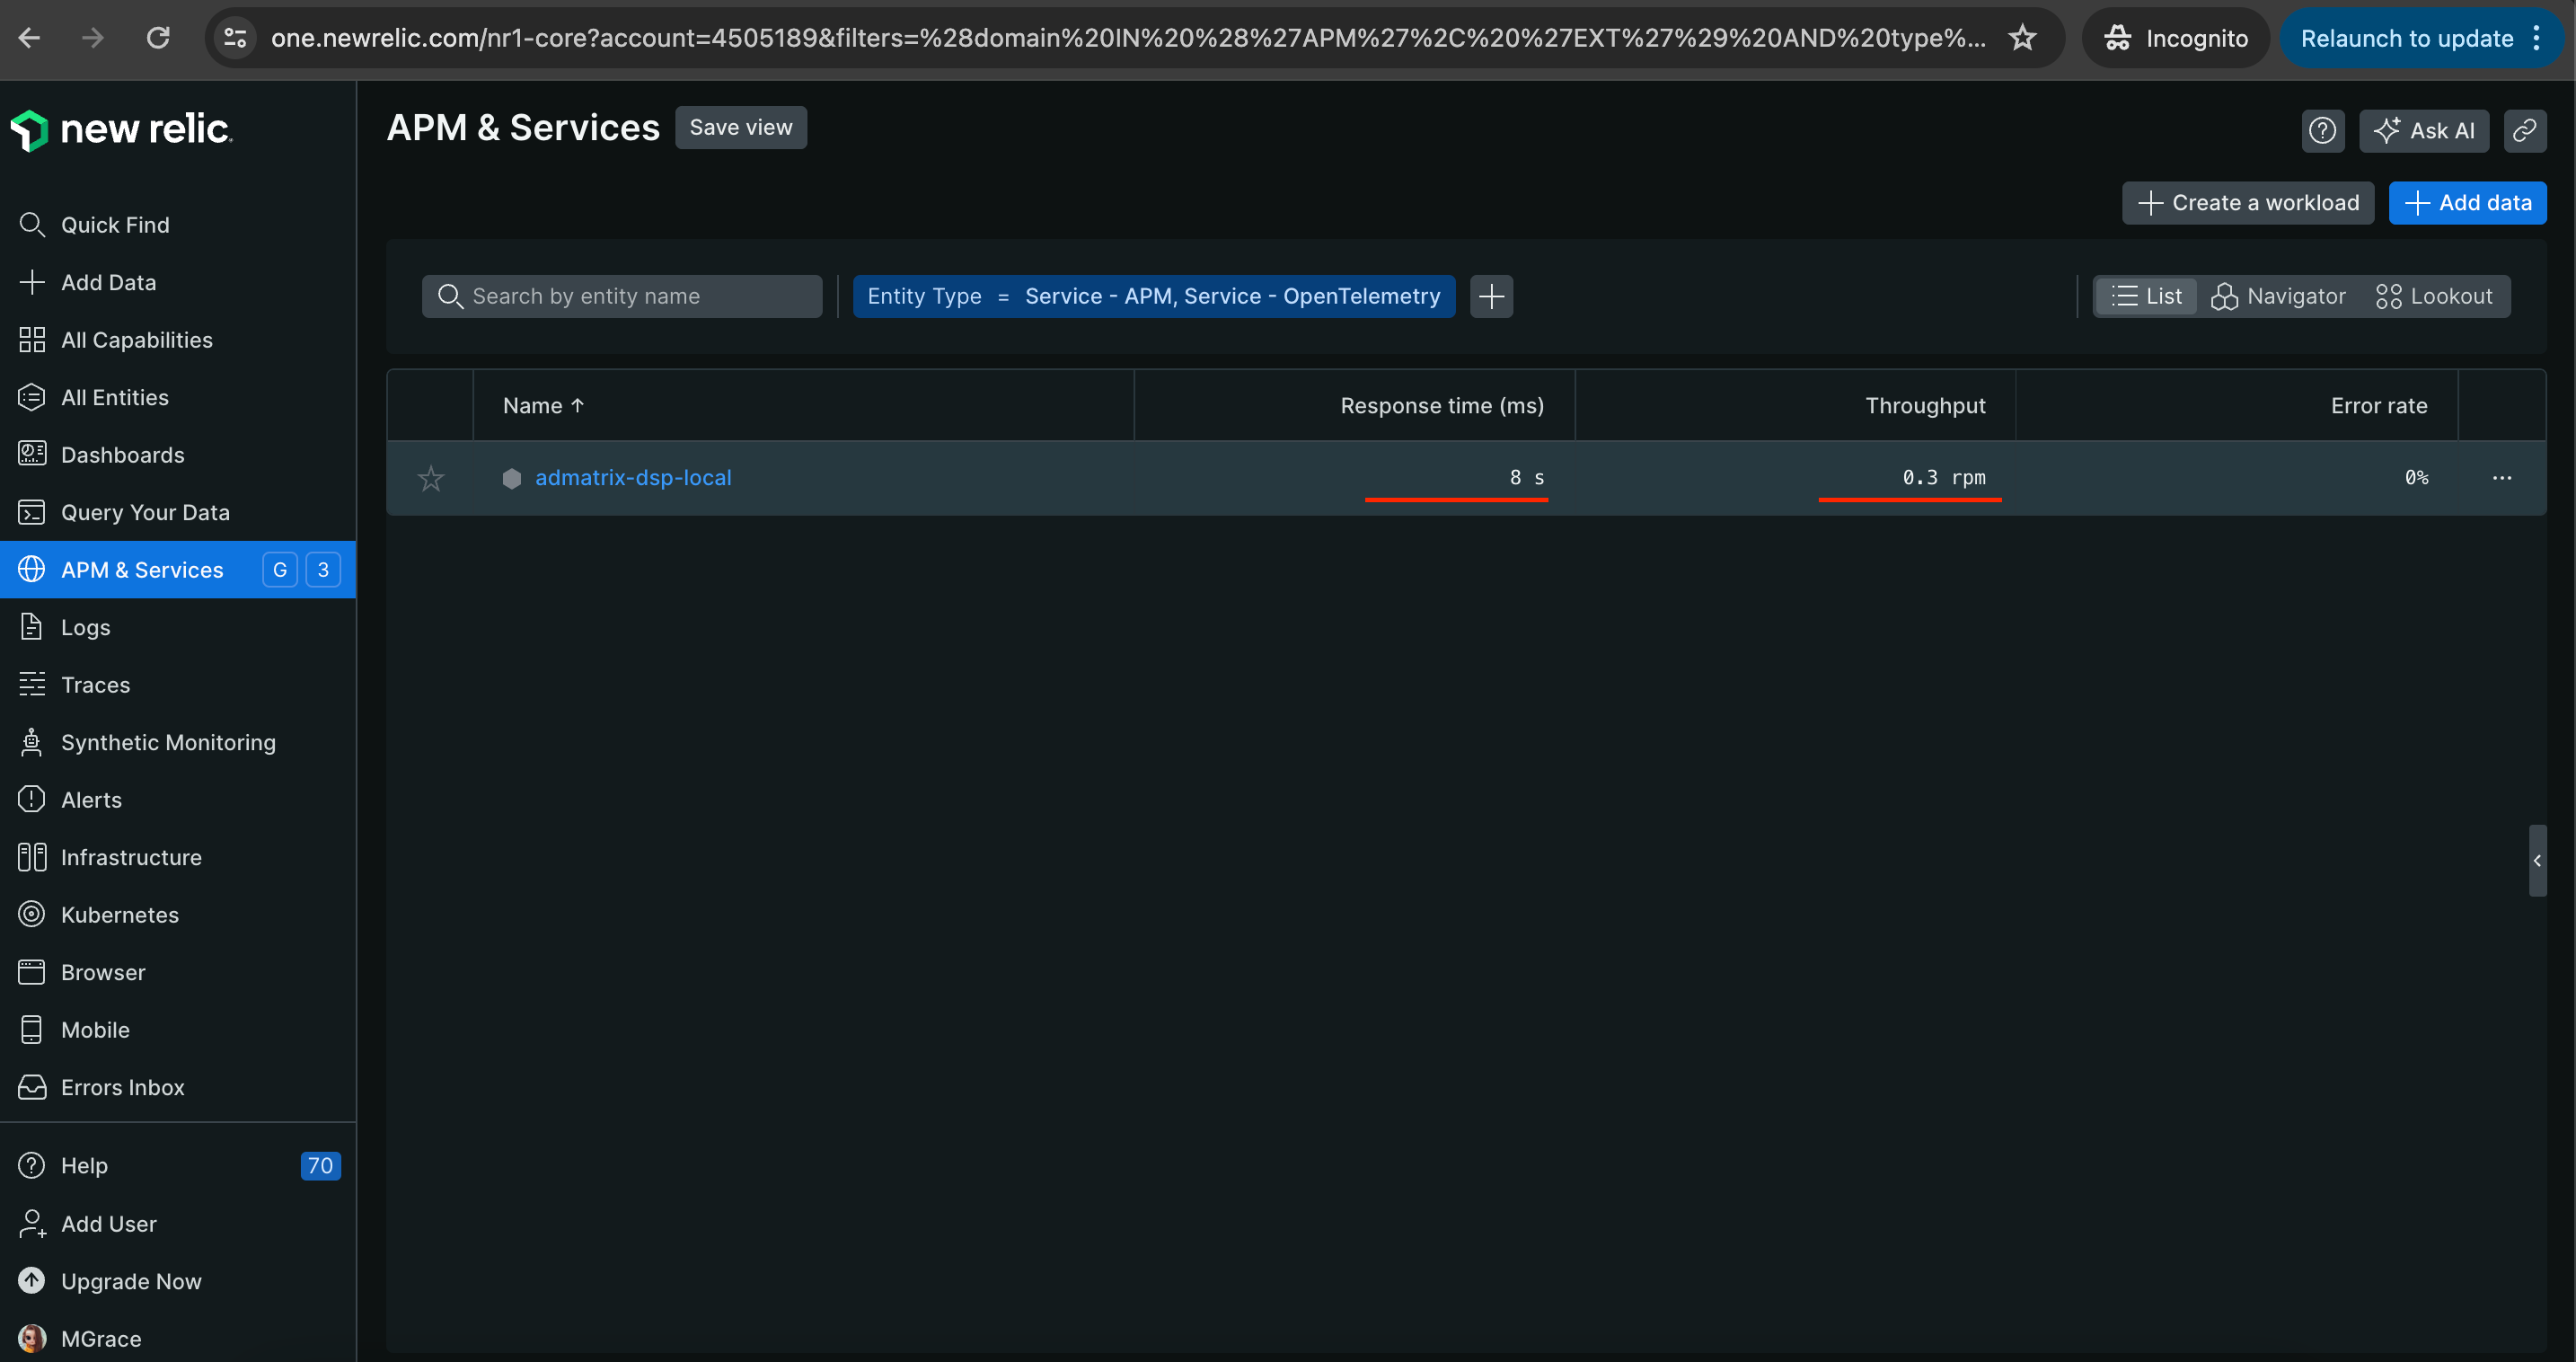
This time our application should be added. The name displayed is based on what app name we declared on our .env file.
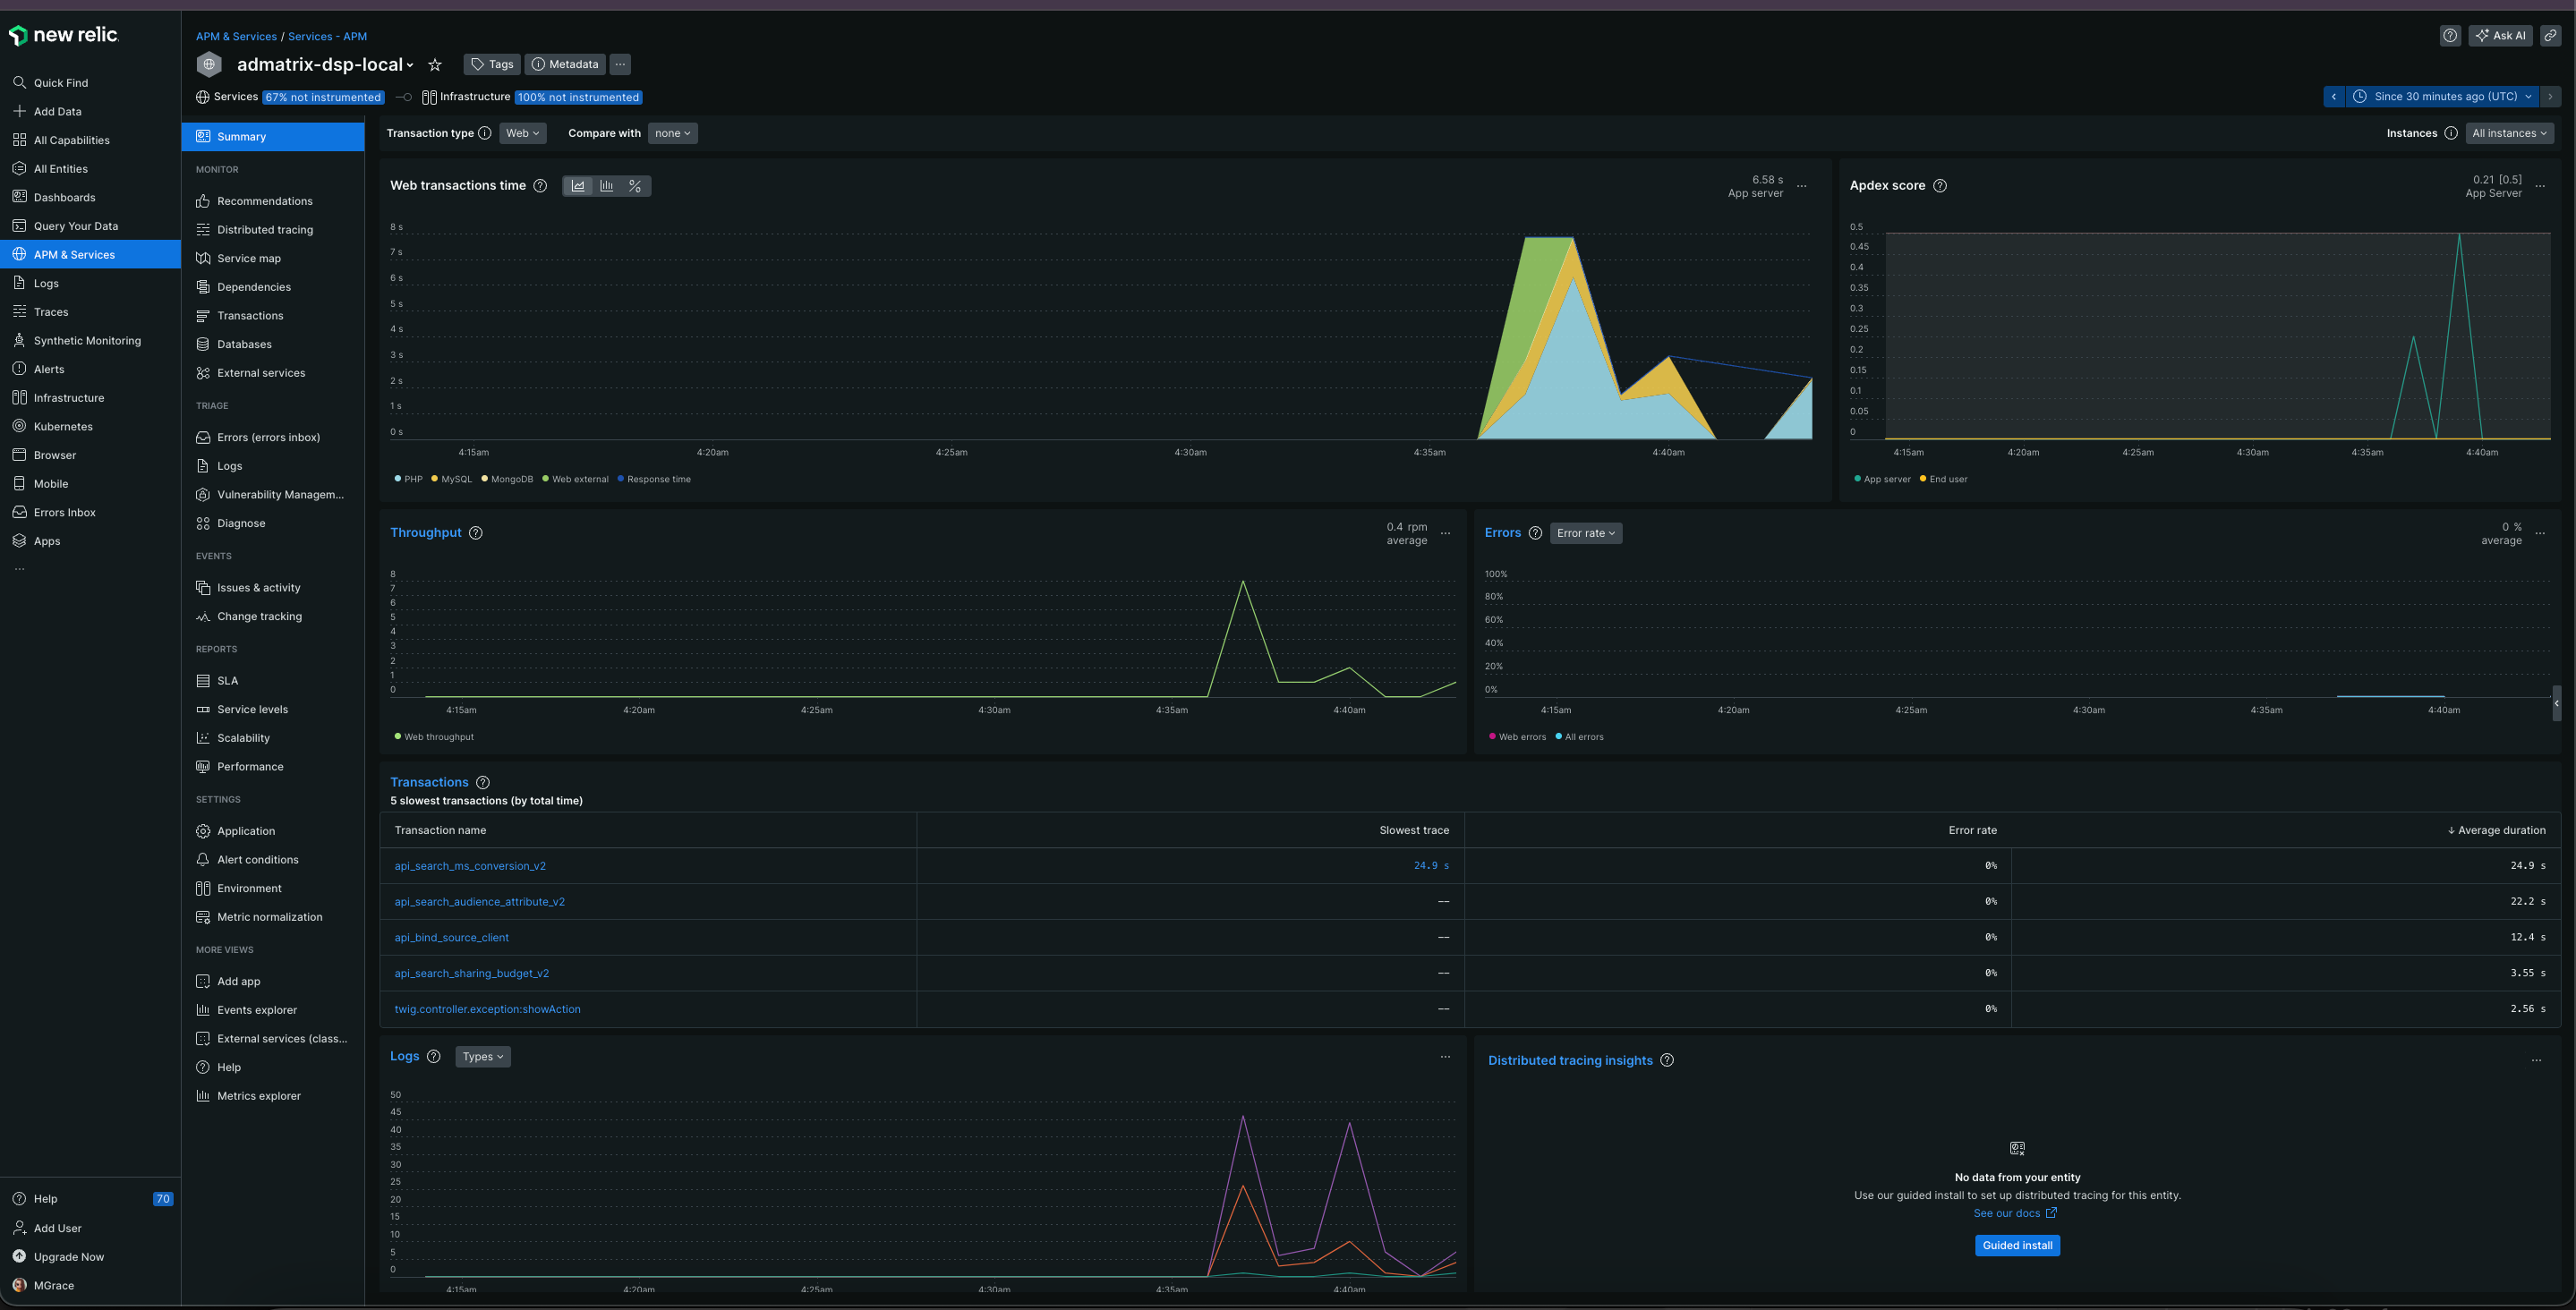
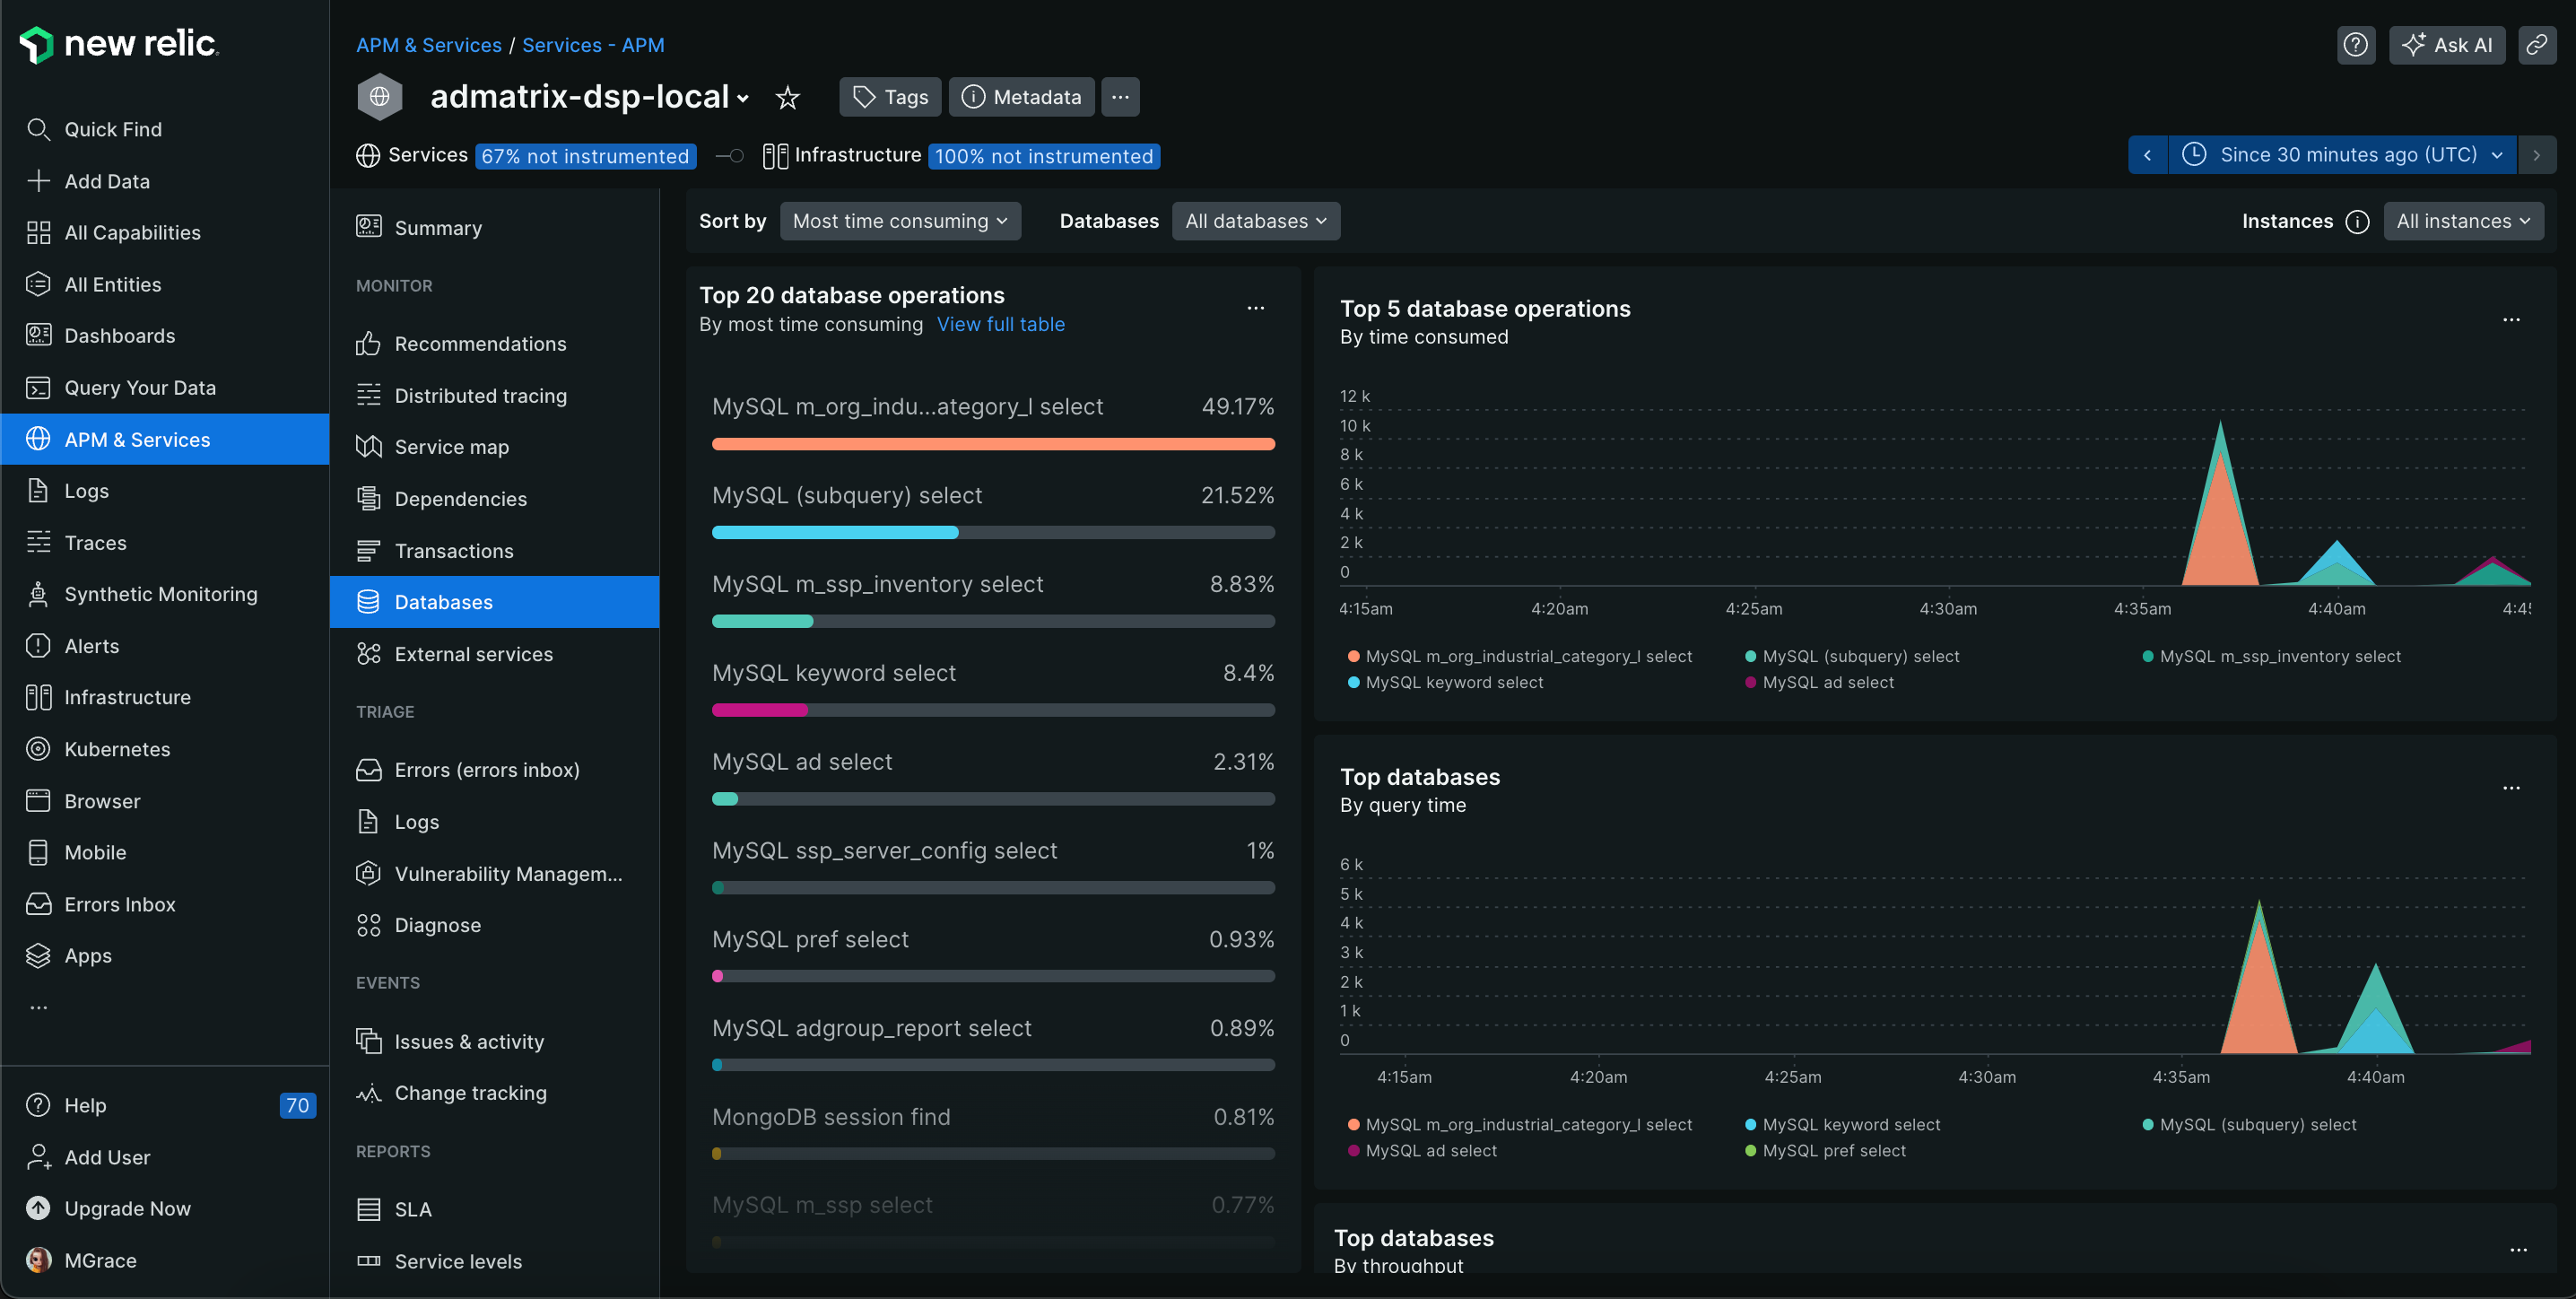
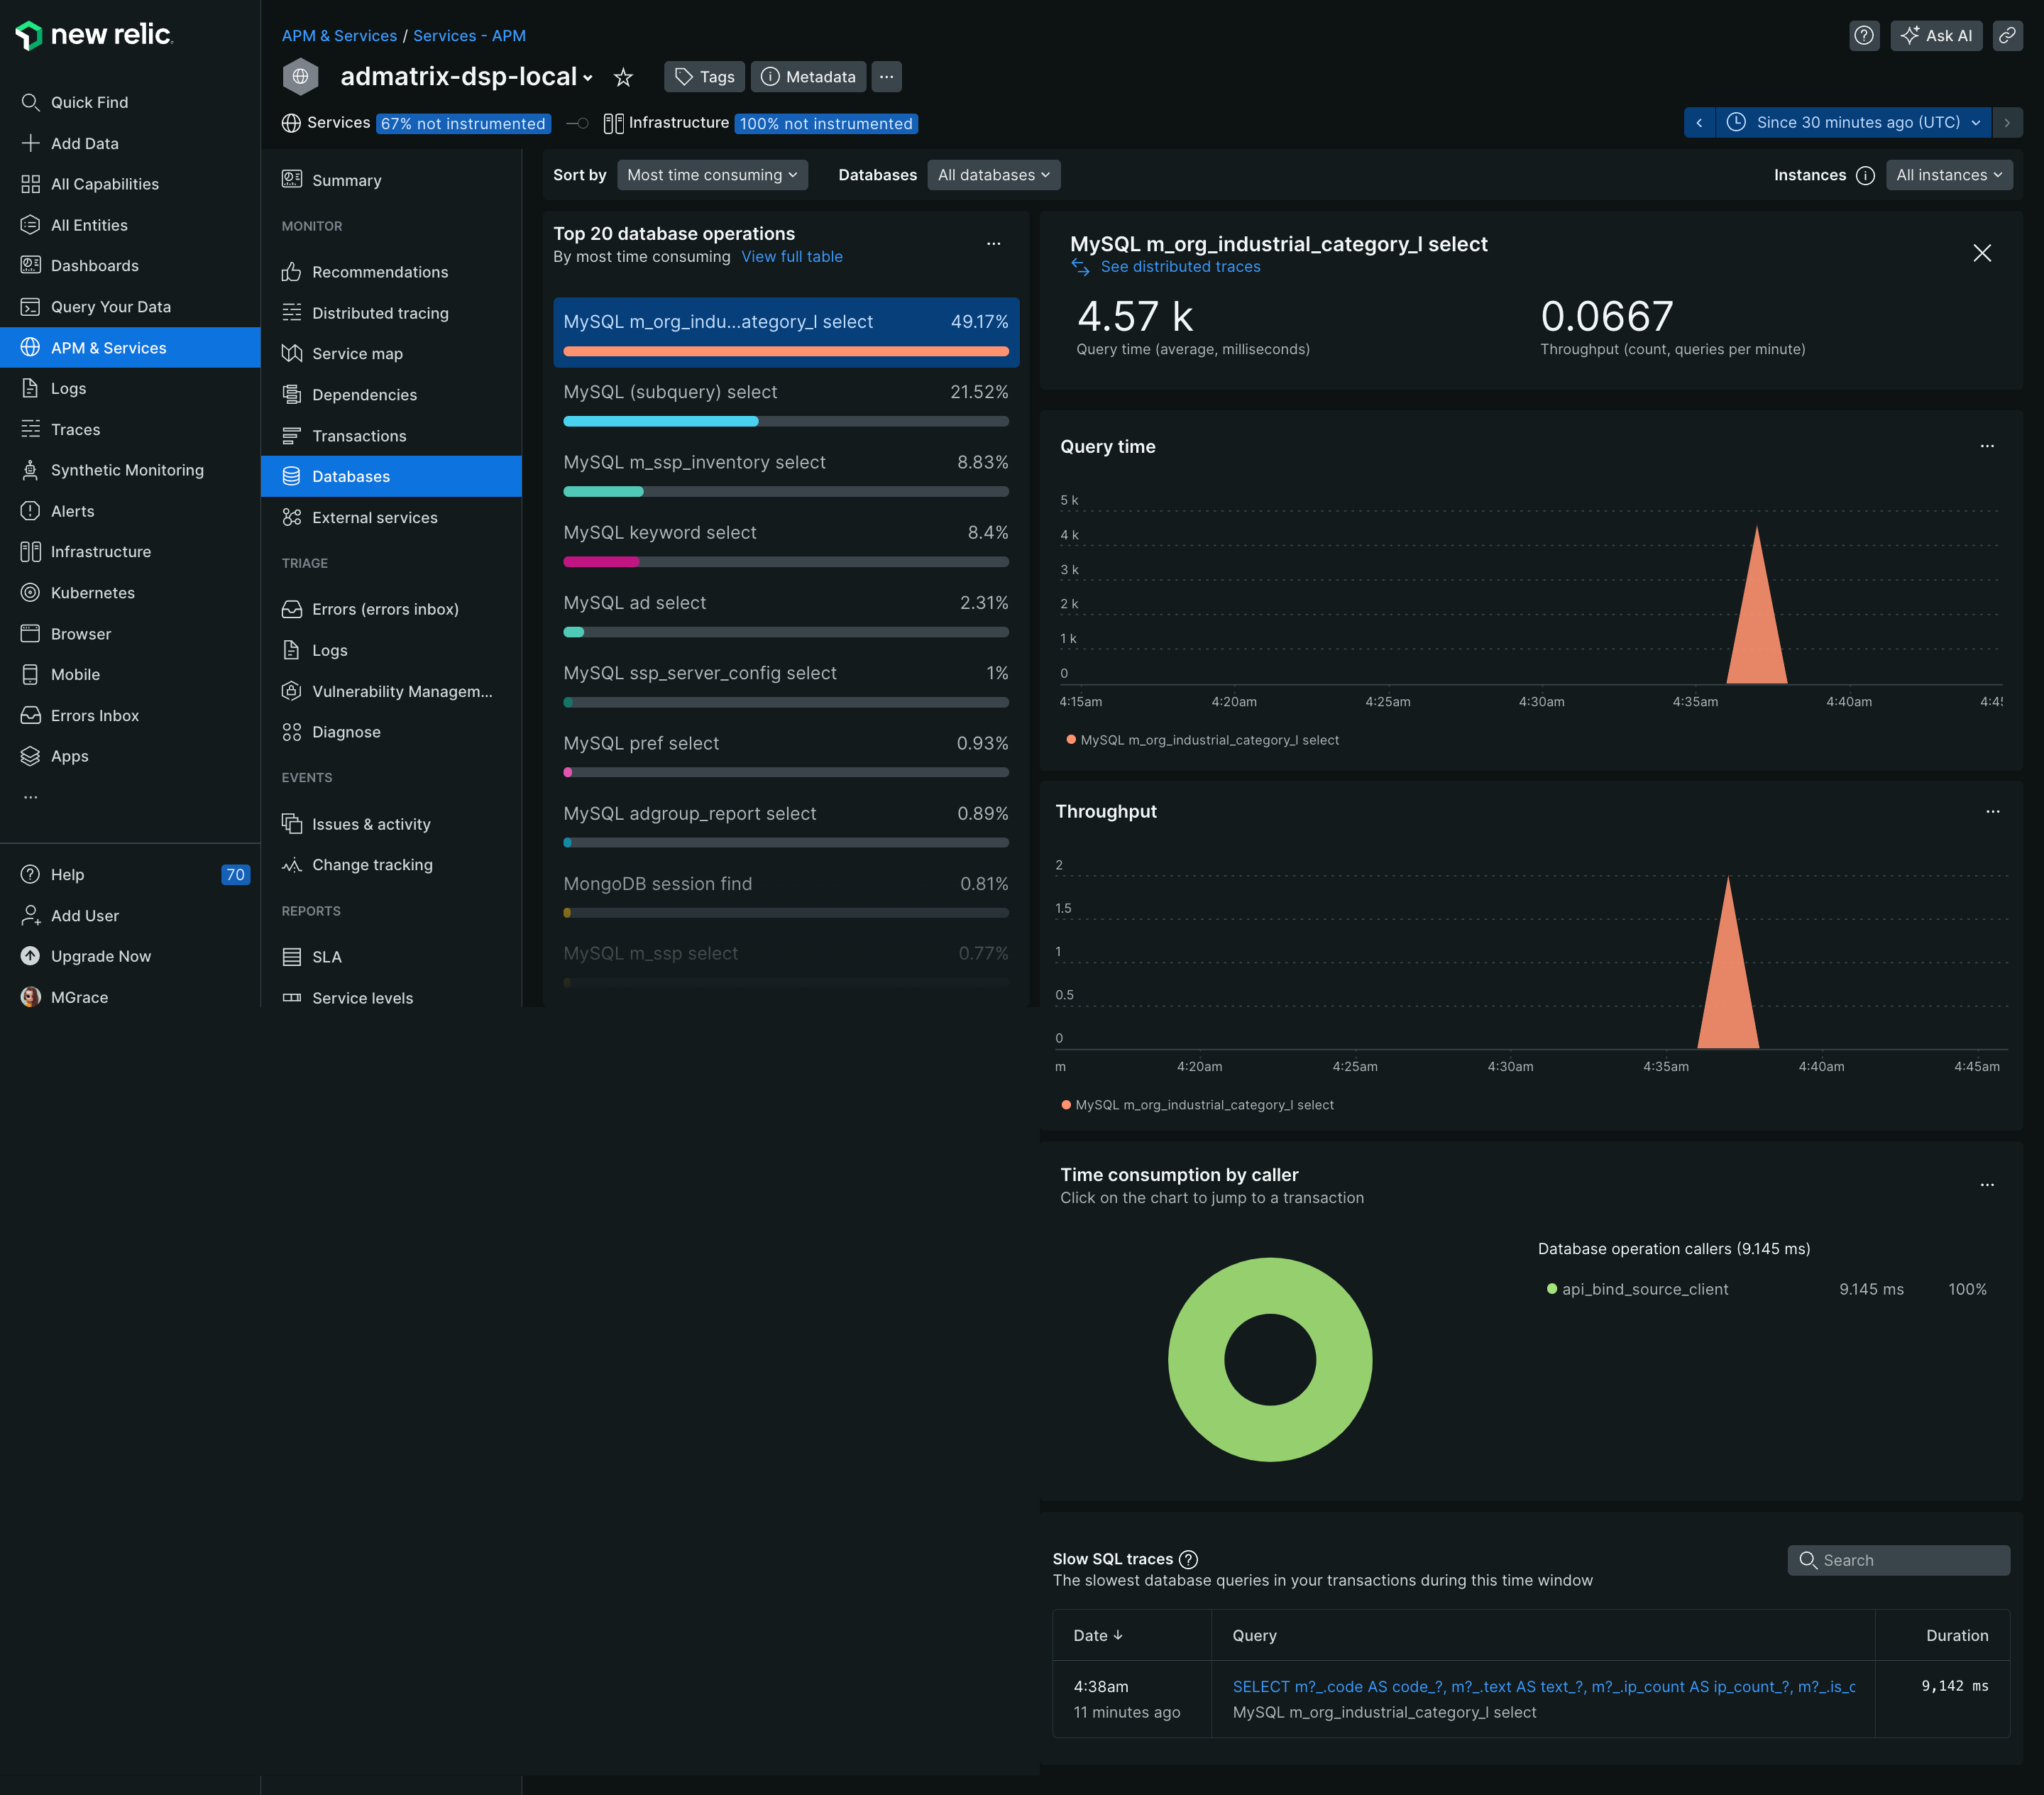
As we try to navigate or make any transactions on our application, New relic monitors its performance and displays logs.
Transactions.
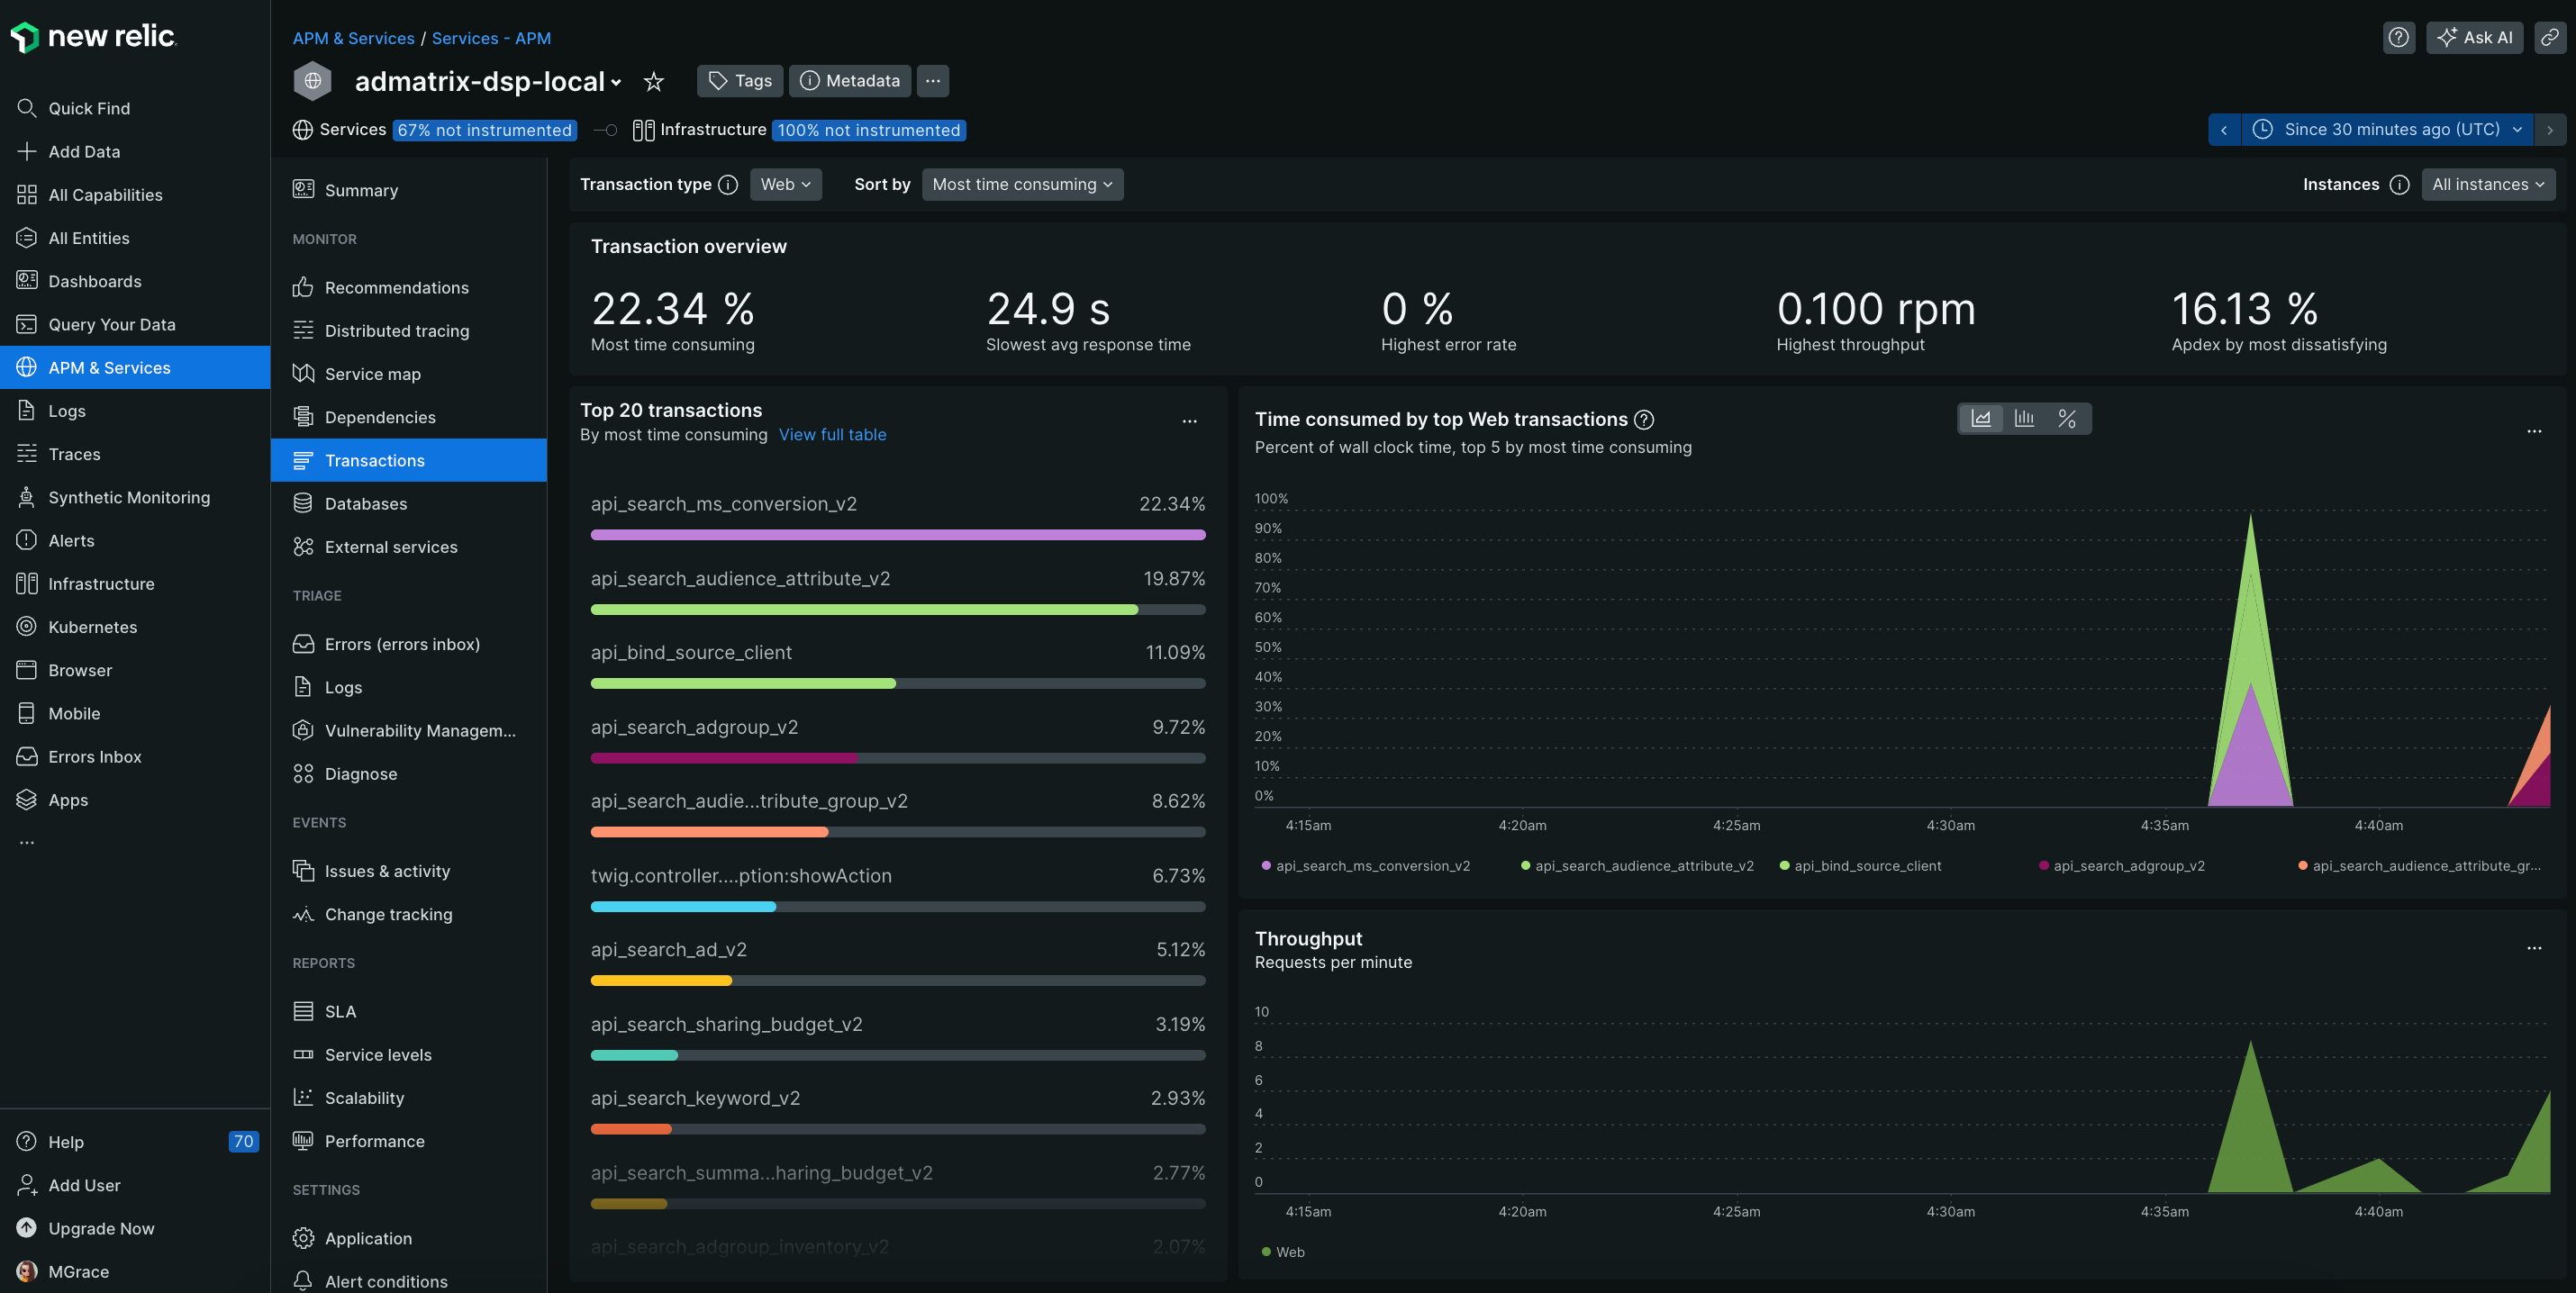
Database query and check the most time-consuming query.
14. Check the Logs
Logs and every page access is also monitored and start measuring page load timing, session performance, AJAX requests, SPA-architecture root changes, and JavaScript errors.
As software engineers, our goal is to provide and deliver flawless websites and applications that offer a good user experience while managing complex transactions and operations behind the scenes. We ensure these applications are continually available and operating at peak performance.
So it is important for us to use some tools where we can monitor and check the health, performance, errors, logs, database queries, metrics, and analytics reporting of our apps. This will allow us to easily make adjustments and implement changes needed to improve the performance of our applications and ensure they remain available and operating at optimal levels.